Rounding Complex Shapes

From Scribus Wiki
Jump to navigation Jump to search
This article is part of the HOWTOs series.
Installation Usage PDF issues Imposition Other
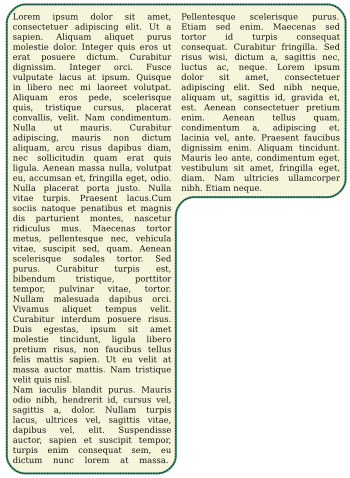
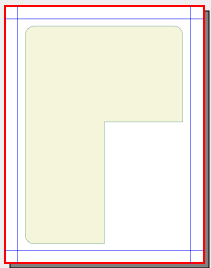
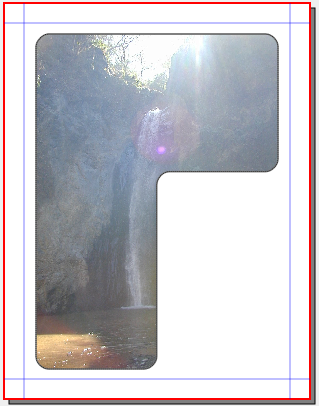
Someone posed a question on Scribus List about how to make the rounded corners of a shape like this. Making the inverted L-shape is easy enough in one of various ways, one being to make a very large letter L in a text frame, then Convert To > Outlines, after which you flip it, resize it a bit, then Convert To > Text Frame.

Ideally, one would like to use the Round Corners feature in the Shape tab, but this is not operational once you have a complex figure such as this, even if you start with a shape that you edit.

What I want to show here is step-by-step how to get to this end result with Scribus.

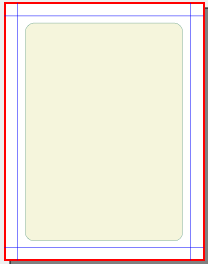
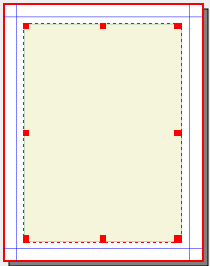
Begin with a rectangular shaped frame – it could be a text frame or the rectangle shape, but for the screenshots you see I've used a rectangle shape, then modified the default background and line colors. Enlarge it to the dimensions you wish, and it's worth making your dimensions nice even numbers and perhaps have page units small, such as either points or millimeters. So here's our beginning frame, viewed at a smaller magnification:
RoundingFrame1.png

RoundedL.png

Beginning Transformation

First, we'll round the corners in the Shape tab. The reason for doing this is that in the end it will save us from manually rounding 3 out of our 6 eventual corners.

Go to Shape tab and run up Round Corners to 25 pts or whatever you like, but remember this value, we're going to use it soon.

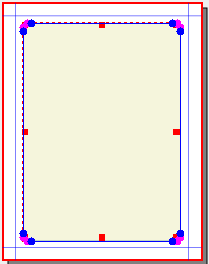
RoundingFrame2.png RoundingFrame3.png Now we have selected the frame and then clicked Shape tab > Edit Shape, so we see our nodes.

First, we want to add some nodes, one on the right-hand side of the frame, the other at the bottom.

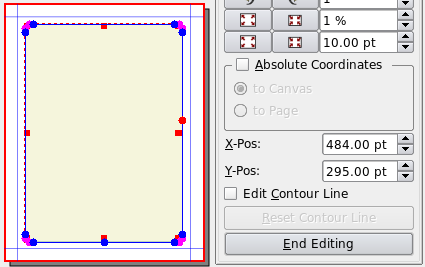
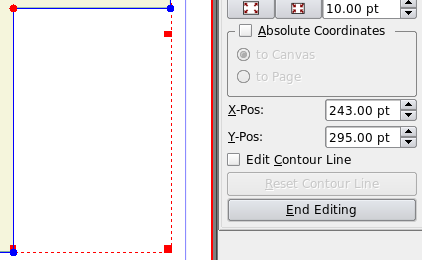
Here are our added nodes, along with the lower part of the Edit Shape dialog. The node in red corresponds to the X-Pos and Y-Pos values you see – once again, a round number make it easier for what comes next. RoundingFrame4.png Now delete both nodes in the lower right corner. We will make a new node, but by deleting these we avoid needing to fiddle with these control points. Now, add a new node anywhere along the path between the nodes we just made, then move this latest new node to an X-Pos corresponding to the new node at the bottom, and a Y-Pos corresponding to the new node along the right side.
RoundingFrame5.png And here we have our basic shape, with 3 corners rounded, 3 more needing rounding. For this example, these are the X-Pos and Y-Pos values needed for this new node, shown in red. See for yourself if you wish by clicking End Editing that Round Corners is now inoperative in the Shape tab. Now we need to get to work, but maybe it's not as much as it seems, with the right preparation. RoundingFrame6.png

Making a Rounding Tool – With a Square

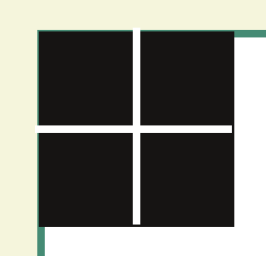
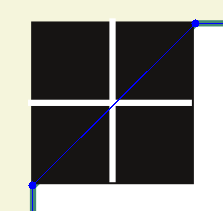
RoundingFrame7.png Here is our rounding tool, made up of a square 25 pts on each side (from the Round Corners setting), with superimposed vertical and horizontal lines positioned at the midpoints of each side. The colors are unimportant, just made to contrast with each other and with the colors of our frame.

A better way to create this tool is to make a square shape, 12 pts on a side, copy it 3 times, and position the copies to leave this 1 pt space. Select all four squares and click Item > Combine Polygons. Save to the Scrapbook so you can use this again in the future.

For the greatest accuracy of measurements when making these shapes, make sure the Line color is "None".

Once you see how this is done, you will also realize that you could make rounded corners without the tool, but once you have the tool, the process is quicker, and you know you have consistent results for each corner.

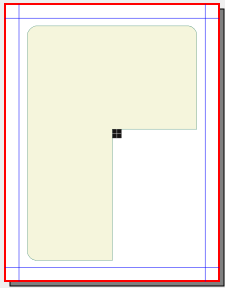
RoundingFrame9.png RoundingFrame8.png The picture at far left is the same page as the picture to the immediate left, but with lower magnification for reference. We'll start with this inner corner since it may seem more difficult (it really isn't).

Use whatever page magnification helps you do this job with as much precision as you feel is necessary.

See how our tool is carefully lined up so its edges coincide with the edges leading to this inner corner, which you can't see because the rounding tool is on top. Since we know the X-Pos, Y-Pos values of the corner, we can easily transfer these to our rounding tool to save time.

Now select the frame (the one we're trying to round corners on) and then go to Shape tab > Edit Shape. Create what you see to the right, either by adding two nodes at the tool's corners and deleting the original node, or creating one of them and moving the original corner node to the other position.

Note that you can leave the rounding tool on top of the other frame without interfering with the shape editing process.

RoundingFrame10.png
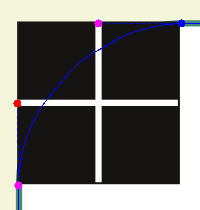
Next, click the Move Control Points button and pull out control points straight to the midpoint of each side of the rounding tool as you see here. Each node has 2 control points – if the corner doesn't bow out, you've got the wrong one. Push it aside, then pull out the other, then replace the wrong one back over the node.

Believe it or not, you're finished – just click End Editing, pull away the tool, and there's your rounded corner, as seen on the far right. You will find that this will precisely line up to the arc of a circle with a radius of (surprise, surprise) 25 pts.

RoundingFrame11.png RoundingFrame12.png

Finishing Up

All that remains is to do the other 2 corners with our rounding tool, then, if you were working with something other than a text frame, Convert To and load your text and finish your layout, or maybe even change your mind and switch to an image frame.

Using this method, you can now use the Line tab or the Color tab to easily change various properties. You can resize as much as you want, but try not to stretch in one direction a lot more than another, since you will distort this circular arc of the corner – this is also true of arcs made with the Round Corners feature.

When doing your layout, if there is some uncertainty about the dimensions of your shape, you may want to hold off on making these round corners, so that adjusting your shape is much easier.

RoundingFrame13.png

But What's This?

RoundingFrame14.png A rounding tool for a shape that has something other than a 90 degree angle.

This tool began as four squares 12 pts on a side, separated by a 1 pt space, then Item > Combine Polygons. The advantage was then being able to skew the figure and keep all components lined up properly.

RoundingFrame15.png