Help:Manual Styles: Difference between revisions
No edit summary |
No edit summary |
||
| Line 1: | Line 1: | ||
[[Help:TOC|Table of Contents]] | [[Help:TOC|Table of Contents]] | ||
| Line 35: | Line 33: | ||
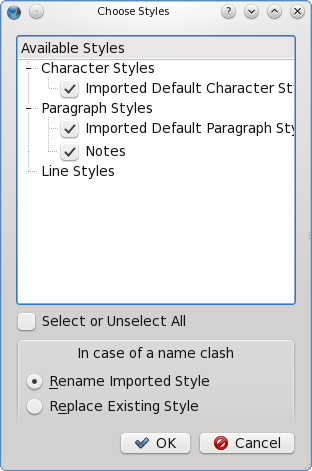
<table width="80%"> <tr><td valign="top">If you click the <b>Import</b> button on the Style Manager dialog, you will then get a file dialog to select a Scribus file for style importation. While you could select any kind of file, styles will only be found in Scribus files – there will be no error message. <p>As seen here, you can then select which styles you wish to import, and can make sure there are no name conflicts. Renaming is an automatic process with this dialog, but of course you can rename the style once it's imported into your document. </p> <p><i>Hint #1: You might consider creating some files which are empty documents, but contain a collection of styles for use in other documents.</i></p> <p><i>Hint #2 for those who like to dissect .sla files: You will also find that, for the purposes of importing a style, you can strip out everything from a file except for the following tags: the <?xml...>, <SCRIBUSUTF8NEW...>,<DOCUMENT....>, <STYLE.....> (however many), </DOCUMENT>, and </SCRIBUSUTF8NEW> tags, and still have something that the styles can be imported from. Do not try to load this as a document, however.</i> </p></td> <td>[[File:Help_style_manager10.png]]</td> </tr></table> | <table width="80%"> <tr><td valign="top">If you click the <b>Import</b> button on the Style Manager dialog, you will then get a file dialog to select a Scribus file for style importation. While you could select any kind of file, styles will only be found in Scribus files – there will be no error message. <p>As seen here, you can then select which styles you wish to import, and can make sure there are no name conflicts. Renaming is an automatic process with this dialog, but of course you can rename the style once it's imported into your document. </p> <p><i>Hint #1: You might consider creating some files which are empty documents, but contain a collection of styles for use in other documents.</i></p> <p><i>Hint #2 for those who like to dissect .sla files: You will also find that, for the purposes of importing a style, you can strip out everything from a file except for the following tags: the <?xml...>, <SCRIBUSUTF8NEW...>,<DOCUMENT....>, <STYLE.....> (however many), </DOCUMENT>, and </SCRIBUSUTF8NEW> tags, and still have something that the styles can be imported from. Do not try to load this as a document, however.</i> </p></td> <td>[[File:Help_style_manager10.png]]</td> </tr></table> | ||
{{OPL}} | [[Category:Help_Manual]] {{OPL}} | ||
Latest revision as of 19:00, 29 March 2012
Working with Styles
Why would someone want to use styles, or why might they be a good idea? Just what are styles in Scribus?
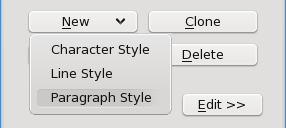
There are two main categories of styles in Scribus, which you will see if you bring up the Style Manager dialog with Edit > Styles. The first is Line Styles, which will be discussed elsewhere in WwLines.html Working with Lines & Line Styles. The other kind of style applies to text layout, and you will see that this has two subtypes, Paragraph Styles and Character Styles. You will also see that there are defaults for each of these. These default settings come in part from the default font settings in File > Preferences > Tools for text frames, but you can also edit the default styles here in the Style Manager.
Paragraph Styles are applied to an entire paragraph of text, as the name implies, while Character Styles will be applied to a collection of letters, words, or even paragraphs of text irrespective of the paragraph style setting. It gets even a bit more confusing since a paragraph style will always contain a character style within its definition.
The why of styles is a matter of convenience, but also of easily achieving a consistent look in a document. For a newsletter, one may want to always use a precise collection of font attributes for headings, the body of the text, sidebars, whatever elements your newsletter may contain. Another convenience with styles is that, once you have applied them, if you edit a style later, the changes will automatically be applied wherever that style is used. Furthermore, styles can be imported from other Scribus documents, or you may clone a style to slightly modify it for some other purpose. Lastly, if you use OpenOffice.org and save in ODT format, you can import and automatically create any styles in Scribus that you may have created in Writer.
With this brief introduction, let's start by making some paragraph styles.
Paragraph Styles
|
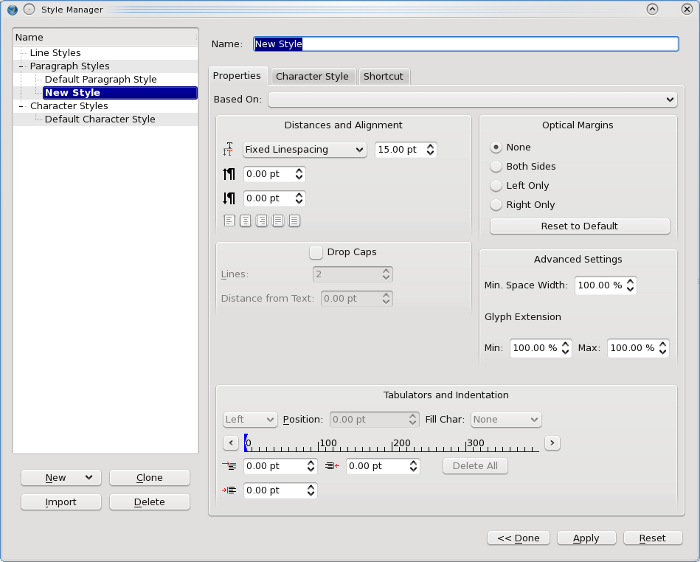
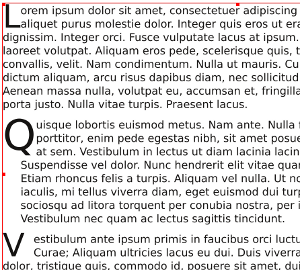
We will not cover various items that you will find in Working with Text, but mainly focus here on settings that are not in the Text tab of the Properties palette. Underneath the linespacing settings we see two spinboxes for determining the white space above and below the paragraph this style is used for. Any space setting will add to the space set for the preceding or following paragraphs. Down below the tabulator settings we also saw in Properties are spinboxes which control indentation. On the left-top, we can set the indentation of the first line of a paragraph relative to the left margin of the paragraph. Assign a negative value for so-called hanging indent. On the left-bottom, we set any paragraph-wide indentation from the other settings of the frame - this include the border of the frame and also any left text distance setting for the frame – this defines the left margin of the paragraph as just mentioned. You can only set for a hanging indent when this value has some positive number, and the absolute value of the hanging indent can be no larger than this value. Example: if you want a hanging indent of -15 pts, you will need a paragraph margin setting of 15 pts or greater. Finally, on the right, we have the right margin of the paragraph, analogous to the paragraph-wide left indentation just mentioned. Here we show a hanging indent and extra space above paragraphs – note that the space above paragraph does not apply to the first paragraph in the frame. | 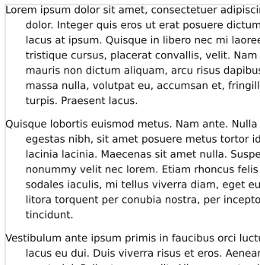 |
Drop Caps
Character Style
| Here we see the Character Style tab in Style Manager – now we can set the various font attributes and glyph modifications. Almost all of these settings have their counterparts in the Text tab of Properties palette, so check Working with Text for their explanation.
The exception is the far-right spinbox in the upper row of spinboxes, next to Tracking. This sets the default width of the space character or glyph (keep in mind that a space is a glyph, but in contrast, a tab is not). It does not affect the space between all glyphs, such as is done with the tracking setting. If one is simply trying to create a character style not associated with a paragraph style, then you will only see this tab with its choices. Character styles can only be applied in the main window, i.e., there is no way to apply a character style in Story Editor – only a paragraph style with its associated character style may be used. There is a hierarchy to text formatting styles, in that a character style will override a paragraph style, even if it is applied to an entire frame, such as one might do in Select Item mode. This hierarchy is also something to keep in mind if you are trying to apply a paragraph style in Story Editor and it doesn't seem to be working. | 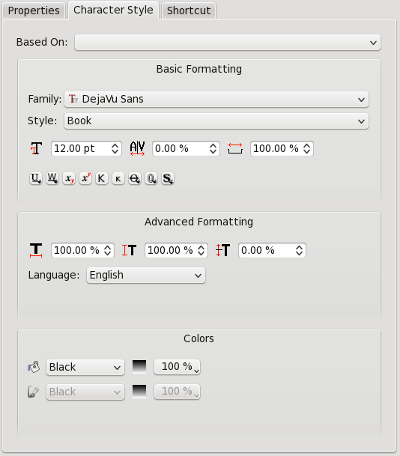 |
Importing Styles
| This material may be distributed only subject to the terms and conditions set forth in the Open Publication License, v1.0 or later. Distribution of the work or derivative of the work in any standard (paper) book form is prohibited unless prior permission is obtained from the copyright holder. A copy of the license is included in the section entitled "Text of the Open Publication License." |

