Photo Albums: Difference between revisions
TrnsltLife (talk | contribs) No edit summary |
TrnsltLife (talk | contribs) No edit summary |
||
| Line 25: | Line 25: | ||
After you create all your page layouts, create scrapbooks for them. Each separate scrapbook goes in a separate directory somewhere on you computer. I created one layout folder for layouts with 1 photo, another layout folder for layouts with 2 photos, etc. | After you create all your page layouts, create scrapbooks for them. Each separate scrapbook goes in a separate directory somewhere on you computer. I created one layout folder for layouts with 1 photo, another layout folder for layouts with 2 photos, etc. | ||
You open the Scrapbook window by using the Windows->Scrapbook menu item. The Scrapbook window has a few icons at the top. The Create icon lets you designate a directory on your computer that will hold a new scrapbook. The Open icon lets you open a directory that contains a scrapbook, and that scrapbook will show up as one of the vertical tabs in the Scrapbook window. | |||
You can add items to your currently selected scrapbook (in the image below, it would be layouts3) by selecting the items in your Scribus window, right-clicking, and choosing the "Send to Scrapbook" item. It might be a good idea to Group your items (Ctrl+G, or Item->Group) before you send them to the scrapbook. Then you are asked to give the item a name. The names I chose look stupid, and I'm not sure they are much more helpful than the "Object1" names it suggests. Do whatever you want for names. | |||
Once your items are in the scrapbook, they are kind of saved automatically, I think. Go look in that directory and you should see files like "Object1.sce". | |||
You can use items in the scrapbook simply by drag-and-dropping them onto your Scribus page. Then align the layout on your page using the "Align and Distribute" window, ungroup the layout (Shift+Ctrl+G or Item->Ungroup), and you can start adding your photos, captions, and text. | |||
[[Image:PhotoAlbums2.png]] | [[Image:PhotoAlbums2.png]] | ||
Revision as of 08:34, 22 September 2007
| Installation • Usage • PDF issues • Other |
Automatic Creation
There are these articles about Automatic import of images from a directory using a script and Automatic import of images: Versions not requiring Tkinter.
Manual Creation
However, I'm going to talk about tips you can use to make creating a photo album by hand easier.
Tip 1: Create Page Layouts
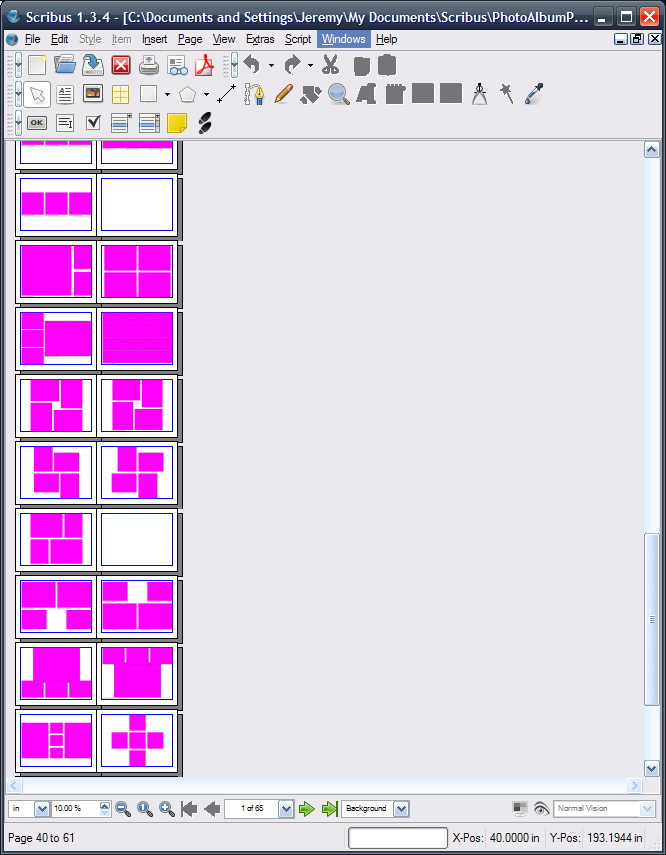
After you figure out what size your pages need to be (the size will depend on where you're planning to print your album), a great thing to do is create page layouts for the kinds of pages you think you'll use. I did this by recreating layouts that I liked from various photo album programs that are freely available. I made all the image frames empty with a Magenta Fill Color, so it would be easy to see the layouts in a thumbnail view like you see below. I also added in text boxes for captions below most of the image frames. If I don't want a caption, I'll delete it later. Admittedly, this step takes a good deal of time. However, it can be fun, and it will definitely be a big help if you plan on making many photo albums. Every time you need a new layout, just add it to your layouts document. Also, try to organize it. I organized it by putting all the layouts with 1 image first, then 2 images, then 3, and so on.
Tip 2: Use the Scrapbook for your Page Layouts
After you create all your page layouts, create scrapbooks for them. Each separate scrapbook goes in a separate directory somewhere on you computer. I created one layout folder for layouts with 1 photo, another layout folder for layouts with 2 photos, etc.
You open the Scrapbook window by using the Windows->Scrapbook menu item. The Scrapbook window has a few icons at the top. The Create icon lets you designate a directory on your computer that will hold a new scrapbook. The Open icon lets you open a directory that contains a scrapbook, and that scrapbook will show up as one of the vertical tabs in the Scrapbook window.
You can add items to your currently selected scrapbook (in the image below, it would be layouts3) by selecting the items in your Scribus window, right-clicking, and choosing the "Send to Scrapbook" item. It might be a good idea to Group your items (Ctrl+G, or Item->Group) before you send them to the scrapbook. Then you are asked to give the item a name. The names I chose look stupid, and I'm not sure they are much more helpful than the "Object1" names it suggests. Do whatever you want for names.
Once your items are in the scrapbook, they are kind of saved automatically, I think. Go look in that directory and you should see files like "Object1.sce".
You can use items in the scrapbook simply by drag-and-dropping them onto your Scribus page. Then align the layout on your page using the "Align and Distribute" window, ungroup the layout (Shift+Ctrl+G or Item->Ungroup), and you can start adding your photos, captions, and text.

