How to layer text inside an existing image
| Installation • Usage • PDF issues • Imposition • Other |
Button … Menu → Choice … Keyboard
Introduction
This tutorial will show you how to add some text to an existing image so that the text looks like it is on a layer "within" that image.
You are expected to already know how to use the basics of Scribus including: creating image frames and putting images in them; creating text frames, entering text, and modifying the font/size of that text. Some basic arithmetic is also needed but it's very easy.
Set-up
Image
First you will need an image to put the text "into". The choice of image is very important as the effect will not look right if the image isn't right.
Preferably your image should have a clear difference between the background and foreground. There should either be a good distance between the subject of the image and what's behind it or the background should be vague. This gives you the space "within" the image to put your text. If there's no space to add the text the image won't look right. You should also try and choose an image where the line between the subject and background is clear without too much "fuzz".
For this tutorial you will be working with a simple image and some basic text but the technique is extendable to more complex projects. You just need to put more time and effort into it.
You can download the image from here.
Font
Your choice of font for the text will depend on the image you're using and the effect you want to create. For instance, if you're doing something with zombies - see the gallery below for an example - you probably wouldn't use "Comic Sans". (You probably shouldn't ever use "Comic Sans" at all but that's a discussion for another time.) Choose something that is appropriate for the image.
For this tutorial you'll be using a font that feels "laid-back", in keeping with the image's beach holiday theme. You can download the "Lobster" font from here.
The Image
- Open Scribus and create a new Landscape-oriented document. (A4/Letter will be okay.)
- Create a image frame that covers most of the page.
- Put the image you want to use in the frame and resize as appropriate.
You need to take a note of some values before you move on.
In ![]() Properties ⟩⟩ X,Y,Z make a note of:
Properties ⟩⟩ X,Y,Z make a note of:
- X-Pos - you can call this value "XB"
- Y-Pos - you can call this value "YB"
In ![]() Properties ⟩⟩ Image make a note of:
Properties ⟩⟩ Image make a note of:
- X-Scale (or Y-Scale, they should be exactly the same) - you can call this value "SC"
Now you need to create some layers.
Layers
- Choose menu Windows → Layers to open the
 Layers palette.
 - Press the + button to create a new layer.
- Double-click the new layer name and change it to "Text" (without the quotes). This layer will contain your text.
- Press the + button again to create another new layer.
- Double-click the new layer name and change it to "Overlay" (without the quotes). This layer will give you the fancy effect.
- Click on the "Text" layer to select it so you can add your text.
Now you'll create some text.
Text
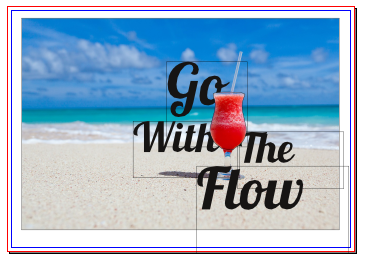
Create some text frames and enter the text you want to use. If you're following along with the tutorial fully you will be looking at creating something like that in figure 1. Make sure some of the text overlaps the glass - as shown in figure 2 - otherwise you will not see any effect and the whole exercise will be pointless.
Now you need to get your "artistic hat" on because you're going to do some tracing. Once you're wearing the appropriate headgear you can continue.
Tracing
- In the
 Layers palette click the checkbox to the far-left of the "Text" layer - underneath the eye icon - to make that layer invisible. It hasn't been deleted, it's just easier to do the tracing when the text isn't there.
This is now the difficult part of the tutorial. You can put as much - or as little - time and effort into this section as you want but the effect and the result will depend on the time you put into it. More time == better effect, it's up to you.
- Click on the "Overlay" layer in
 Layers to select that layer.
 - Zoom in so that the glass almost fills the centre of your Scribus canvas. You will probably need to zoom in and out many times while you work on this.
- Choose menu Insert → Insert Bezier Curve
- Now draw a line around the edge of the bowl of the glass.
You don't need to be exact at this stage, just draw something that approximates the shape. You're looking for something that looks like figure 3. Don't bother trying to close the line into an enclosed shape, you'll get Scribus to do that for you later.
- With your curve/line selected, go to
 Properties ⟩⟩ Line
 - Change the Line Width to "Hairline" (click the little down arrow to the right of the text entry field).
Looking at the line you drew it probably doesn't look as accurate as you thought it would be - see figure 4 - but that's fine. You can fix it next.
- Double-click the line to enter the
 Node Editor
This is the part of the tutorial where you can take as much time as you want to get things looking right.
- Click on the "Close this Bezier Curve" icon
 (three down, second from left) to close the curve into a shape.
Now you need to drag the blue control points as near to the edge of the glass so as to leave as little gap as possible. You can use the "Add Nodes" icon to add a node to a line or you can choose Item → Path Tools → Subdivide Path to put extra nodes at the centre of each existing line.
If you are feeling adventurous you can use the "Move Control Points" icon to change the position of the line control points to make the lie curvy to better fit the image.
Basically, the more time you take doing this the better the result. The trick is to try and put the curve as close as you can to the place where the glass and the background meet. Figure 5 shows a reasonable attempt with just straight lines.
Once you are finished editing press End Editing on the ![]() Nodes Editor to see the result. It should look a bit like figure 6.
Nodes Editor to see the result. It should look a bit like figure 6.
Now you need to convert the shape to an overlay.
The Overlay
- Choose menu View → 100% to see the whole page again.
- Select the shape you traced.
- In
 Properties click the "Line Colour" icon.
 - Choose "None" from the list of colours below the "Line Colour" icon.
The shape has disappeared but that's okay.
- Right-click where the shape should be and choose Convert to → Image Frame
- Right-click the new image frame and choose Get Image…
- Locate the image you used for the background and OK the dialog.
You should now have something that looks like figure 7. It looks very strange but you're going to fix that now.
- Go to
 Properties ⟩⟩ X,Y,Z
 - Look at the "X-Pos" value and subtract it from the "XB" value you noted earlier (this was the X-Pos of the background image).
- Look at the "Y-Pos" value and subtract it from the "YB" value you noted earlier (this was the Y-Pos of the background image).
- Go to
 Properties ⟩⟩ Image
 - Make sure that the "Free Scaling" radio button is selected.
- In both the "X-Scale" and "Y-Scale" fields manually enter the "SC" value you noted earlier (this was the X-Scale of the background image).
- Manually enter the result of the X-Pos subtraction in the X-Pos field.
- Manually enter the result of the Y-Pos subtraction in the Y-Pos field.
Your glass should look like it's back to normal as in figure 8. If it doesn't then check your calculations. You want to subtract the X-Pos and Y-Pos values of the shape from the corresponding values of the background image.
You can now switch the text back on.
- In
 Layers click the checkbox to the far-left of the "Text" layer to make it visible again.
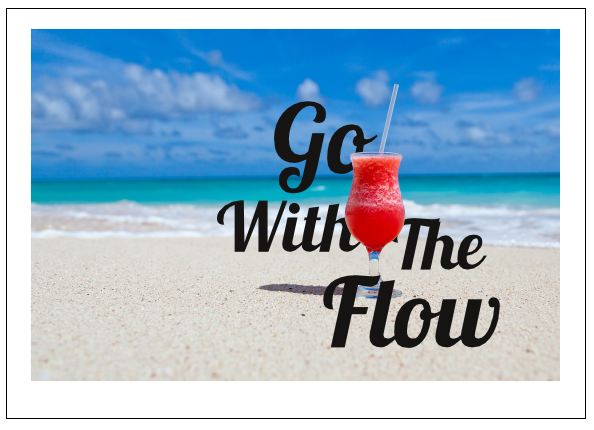
Your document should now look like figure 9. You might notice that there is a dark line around the glass. Don't worry about this. It is the frame the overlay image is in and is only shown when you have your view settings set to "Show Frames". Use menu View → Preview Mode to see how the document will look when exported.
And now you have some of your text "behind" the glass.
You can now play around with the text. You can move it around, or change it's colour, or give it an outline. Whatever you want to do with it.
Gallery
Below are some experiments using the same technique which might help to show you the sort of things which can be achieved quite simply.
Sand & Sea
The text in the picture above was given outlines and different colours. The whole girl wasn't traced. Only the parts of her that would be near the text were traced and those shapes were combined to make a new shape which was used as the overlay image.
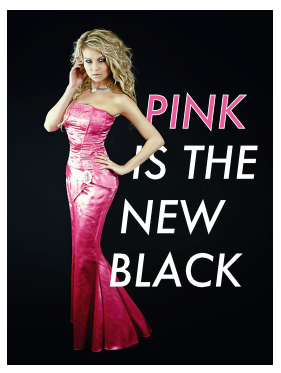
Pink Dress
On this image, only the girl's arm was traced. The italic font combined with the horizontal offset of the text make the text look a bit like it's coming from back to front (therefore the bottom bit of text is in front of the girl). The black background made it easy to trace the overlay shape.
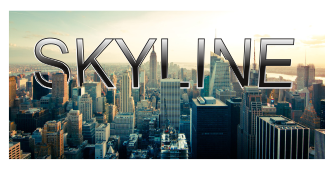
Skyline
Here only some of the buildings were traced around (essentially those at the same distance from the camera). This gives the impression that the text has been dropped into the middle of the city (well, sort of anyway). The text was manipulated with various gradient fills.
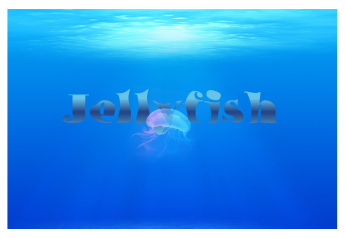
Jellyfish
Here the overlay image layer was given a lower opacity (around 80%) so that the text layer shows through a bit making the jellyfish slightly transparent.
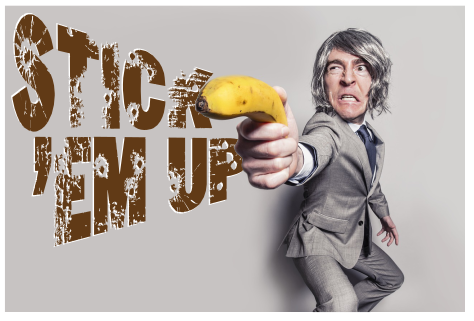
Stick 'em Up
Here the text was manipulated with a Mesh Transform and only the banana and hand needed to be traced.
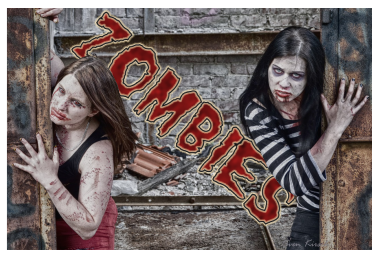
Zombies
For this image the sides of the two girls were traced and combined to create the overly image shape. Care needs to be taken with hair but if your reader doesn't know what the original image looked like then you can get away with some "trimming". The text is filled with a simple texture created in GIMP while the outline of the text was exported to GIMP and given a slight glow effect.
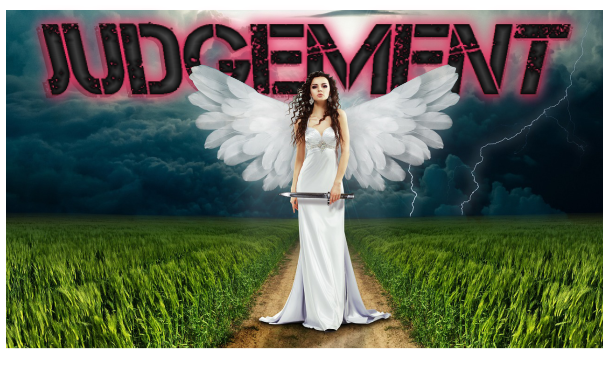
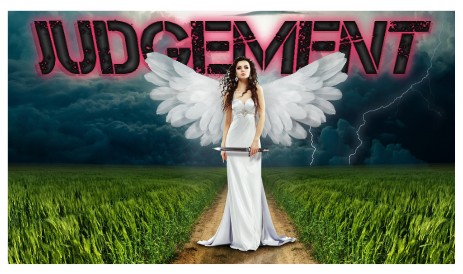
Judgement
The whole top section of the angel needed to be traced for this image and the bezier line had to be made into curves to properly trace the wings and her head. The text was given a Mesh Transform and exported to GIMP for further processing before being imported back into Scribus.
Conclusion
You have seen how you can use various functions in Scribus to put some text "inside" an existing image. You have also seen, in the examples, how you can also do the same with other images. Try experimenting and see what sort of things you can create.
