Creating a 3D-effect border: Difference between revisions
m (→Experiment) |
|||
| Line 46: | Line 46: | ||
* Select your new style to apply it to the object. | * Select your new style to apply it to the object. | ||
==Experiment== | == Experiment == | ||
Try experimenting with changing | Try experimenting with changing colours and line types to see what kinds of effects you can create. You can make some interesting borders with only a few clicks. | ||
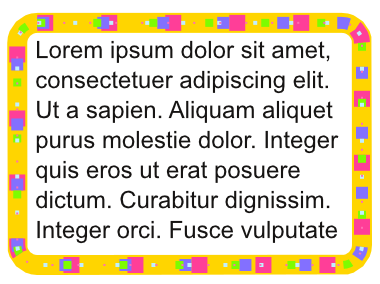
For instance, something like the border below could be used to jazz-up a newsletter article for a party. | For instance, something like the border below could be used to jazz-up a newsletter article for a party. | ||
[[ | [[File:Line_Style_Party_Border.png|centre]] | ||
Latest revision as of 08:59, 25 March 2015
| Installation • Usage • PDF issues • Imposition • Other |
Button … Menu → Choice … Keyboard
Introduction
If normal borders are not flashy enough for you and you want something different, you can create a 3D-effect border, like that above, very simply.
Start
First create the shape you want the effect to be seen on. In this article a rectangular text frame has been used.
Colours
Before you can create the 3D-effect you need to make sure you have at least 4 grey colors of differing darkness, with also a very dark (black) and very light (white) color.
If you don't have these colors in your document's color palette you'll need to either create them or import them from another document or a Scribus palette.
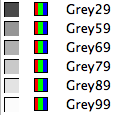
In this article the X11 palette was used, specifically these colors:
Line Styles
To get a 3D-effect border you need to create your own line style.
- Choose menu Edit → Styles
- In the
 Style Manager palette press the New button and select Line Style from the drop-down menu.
 - Give the style an appropriate name, such as "3D Style" (without the quotes).
- Press the "Add Line" icon until you have six lines in the box below it.
- Select the bottom of these lines and select black, or the darkest colour you have.
- Give the "Line Width" as 10 points (or whatever width is appropriate for your measurement units).
- Select the first line in the box and make it white (or your lightest colour) with a width of 1 point (or another minimum value).
- For each of the lines between the first and last give it a colour that is darker than the one above and make the width greater than the line above. In the example image at the top of this article the following has been used: 1 pt "Grey99"; 2 points "Grey89"; 4 points "Grey79"; 6 points "Grey69"; 8 points "Grey59"; 10 points "Grey29".
- You can check the effect as you go by looking at the preview image.
- Once your "3D tube" preview looks right press << Done
- You can also close the
 Style Manager palette if necessary.
Apply the effect
Now you'll need to apply your new style.
- Select the object you want to give a 3D-effect border to.
- Open
 Properties and select the Line tab.
 - You should see your new line style listed in the selection box.
- Select your new style to apply it to the object.
Experiment
Try experimenting with changing colours and line types to see what kinds of effects you can create. You can make some interesting borders with only a few clicks.
For instance, something like the border below could be used to jazz-up a newsletter article for a party.


