Howto work with paragraph styles: Difference between revisions
No edit summary |
No edit summary |
||
| (5 intermediate revisions by the same user not shown) | |||
| Line 1: | Line 1: | ||
{{HOWTO Index}} [[Category:EN]] | {{HOWTO Index}} [[Category:EN]] | ||
[[File:Paragraph_styles_final.png|300px|thumb|center|Destination]] | |||
==About== | |||
This is about the Paragraph Effects in Scribus 1.5. | |||
==Introduction== | ==Introduction== | ||
If you work e.g. on a science book or with law texts you often have to use a lot of Paragraph Effects for the headlines. | If you work e.g. on a science book or with law texts you often have to use a lot of Paragraph Effects for the headlines. | ||
Instead of doing that manually, you can let Scribus do the work for you. | Instead of doing that manually, you can let Scribus do the work for you. And you really will love it, if you have to add or delete lines, as Scribus will reorder automatically. | ||
== | ==Famous first words== | ||
Sometimes Scribus will show a "?" (question mark) instead of the expected result - don't worry, this is to save resources. Just go to "Extras - Update Document" and everything is fine. | |||
==How to== | |||
===Creating Paragraph Styles=== | |||
You get there by pressing "F3". <br> | You get there by pressing "F3". <br> | ||
The Style Manager opens and you can create a new Paragraph Style. Name it - for example as level1.<br> | The Style Manager opens and you can create a new Paragraph Style. Name it - for example as level1.<br> | ||
Next step recommended ist to go to the tab "Paragraph Effects", choose "Numbering" and create a new set. In every level you have to select this new set! | Next step recommended ist to go to the tab "Paragraph Effects", choose "Numbering" and create a new set (I took "Example"). In every level you have to select this new set! | ||
Now feel free to define this level.<br> | Now feel free to define this level.<br> | ||
| Line 18: | Line 26: | ||
<table width="100%"> | <table width="100%"> | ||
<tr> <td>[[File:Style_manager_1.png|150px|thumb|center|Properties]]</td><td>[[File:Style_manager_2.png|150px|thumb|center|Paragraph Effects]]</td><td>[[File:Style_manager_3.png|150px|thumb|center|Character Style]]</td></tr></table> | <tr> <td>[[File:Style_manager_1.png|150px|thumb|center|Properties]]</td><td>[[File:Style_manager_2.png|150px|thumb|center|Paragraph Effects]]</td><td>[[File:Style_manager_3.png|150px|thumb|center|Character Style]]</td></tr></table> | ||
As you can see in the 2nd image, you can set the prefix and suffix as you want. In this example I took "Art. " as prefix, and "." as suffix. With "Distance from text" you set the space to the text or next level. | |||
Now it's time to create the next level - add new Paragraph Style, make the properties and don't forget to choose the set (here "Example") and the level.<br> | |||
The same procedure with further levels. | |||
'''Special case:'''<br> | |||
To structure the document I indented the levels 2, 3 and 4 (shown in image 1).<br> | |||
If you now add text it will not be indented if you choose "Default Paragraph Style". So you have to create own Paragraph Styles for this. I named them level21, level31 and level41 - with the same indentation as level2, 3 and 4. You also can define alignment, character style and so on. Just no Paragraph Effects. | |||
===Writing the text=== | |||
A lot of work in preparation, but now it's really easy to create documents with Paragraph Effects.<br> | |||
Just open the Text Editor, write your text and choose for every line the right level. (You also can choose the level by marking and directly editing the lines, but that may be confusing with larger documents.) | |||
In the Text Editor the document at the top of this site looks like this: | |||
[[File:Paragraph_styles.png|600px|thumb|center|Text Editor and result]] | |||
==Famous last words== | |||
This is a very complex explanation with a lot of special cases. Mostly it's much easier, but I wanted to show what is possible with Scribus. | |||
Latest revision as of 09:16, 29 March 2016
| Installation • Usage • PDF issues • Imposition • Other |
About
This is about the Paragraph Effects in Scribus 1.5.
Introduction
If you work e.g. on a science book or with law texts you often have to use a lot of Paragraph Effects for the headlines. Instead of doing that manually, you can let Scribus do the work for you. And you really will love it, if you have to add or delete lines, as Scribus will reorder automatically.
Famous first words
Sometimes Scribus will show a "?" (question mark) instead of the expected result - don't worry, this is to save resources. Just go to "Extras - Update Document" and everything is fine.
How to
Creating Paragraph Styles
You get there by pressing "F3".
The Style Manager opens and you can create a new Paragraph Style. Name it - for example as level1.
Next step recommended ist to go to the tab "Paragraph Effects", choose "Numbering" and create a new set (I took "Example"). In every level you have to select this new set!
Now feel free to define this level.
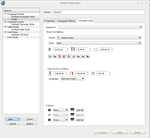
You can set the font, font size, color, alignment, tabulator - everything you can choose in the text section of the Properties Palette.
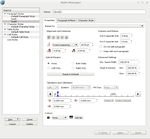
As you can see in the 2nd image, you can set the prefix and suffix as you want. In this example I took "Art. " as prefix, and "." as suffix. With "Distance from text" you set the space to the text or next level.
Now it's time to create the next level - add new Paragraph Style, make the properties and don't forget to choose the set (here "Example") and the level.
The same procedure with further levels.
Special case:
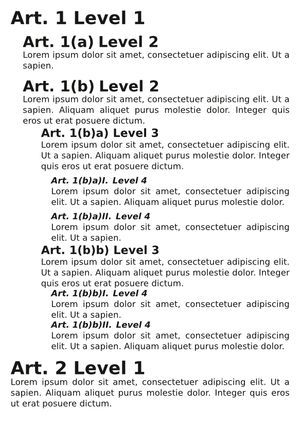
To structure the document I indented the levels 2, 3 and 4 (shown in image 1).
If you now add text it will not be indented if you choose "Default Paragraph Style". So you have to create own Paragraph Styles for this. I named them level21, level31 and level41 - with the same indentation as level2, 3 and 4. You also can define alignment, character style and so on. Just no Paragraph Effects.
Writing the text
A lot of work in preparation, but now it's really easy to create documents with Paragraph Effects.
Just open the Text Editor, write your text and choose for every line the right level. (You also can choose the level by marking and directly editing the lines, but that may be confusing with larger documents.)
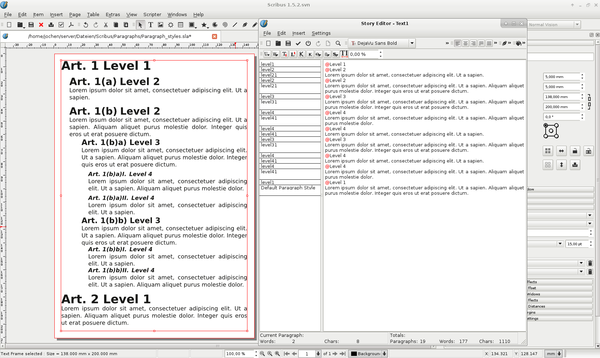
In the Text Editor the document at the top of this site looks like this:
Famous last words
This is a very complex explanation with a lot of special cases. Mostly it's much easier, but I wanted to show what is possible with Scribus.


