Making Guides at an Object's Borders: Difference between revisions
| (One intermediate revision by the same user not shown) | |||
| Line 92: | Line 92: | ||
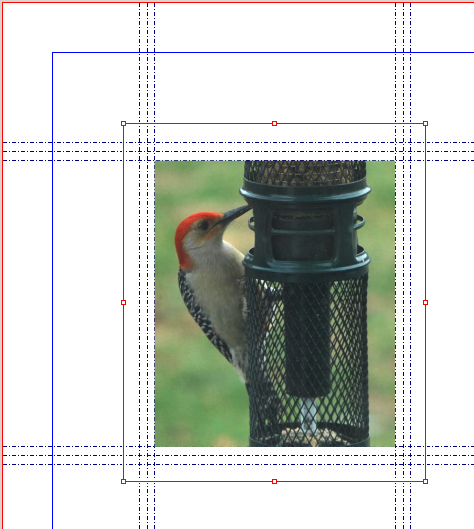
|In this example, the script was run 3 times, with values of 20, 15, and 10 for the percentage reduction. Afterward, the image scaling was reduced by 20% and the X-Pos and Y-Pos of the image inside the frame adjusted so that it lined up with the inner guides. | |In this example, the script was run 3 times, with values of 20, 15, and 10 for the percentage reduction. Afterward, the image scaling was reduced by 20% and the X-Pos and Y-Pos of the image inside the frame adjusted so that it lined up with the inner guides. | ||
You might have also run the script, then | You might have also run the script, then create an image frame using the Shift-click method, which would have created a scaled-down frame fitting the guides, and then loading the image afterward and clearing the image from the larger frame. | ||
Incidentally, if you enter '0' in the '''valueDialog()''' you placing the guides at the object's borders, as with the original script. | |||
|} | |} | ||
Latest revision as of 18:46, 1 February 2017
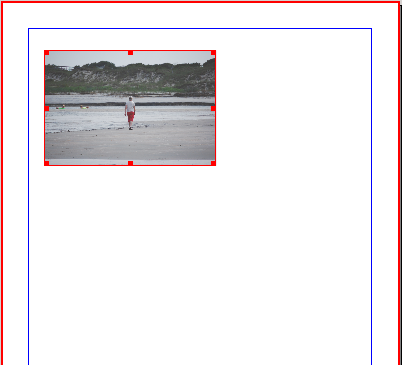
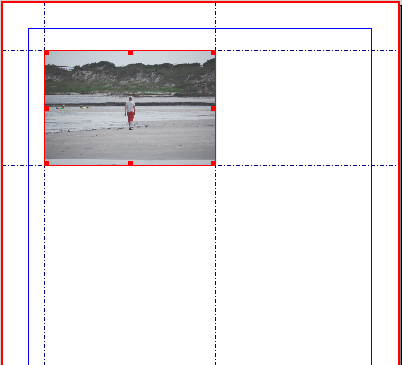
This is a simple script whose idea comes from imagining that you have first created an object on the page and now you want to set some guides at the borders of the frame as a reference for other page content.
Usage is quite simple. Just select your object, run the script. Any pre-existing guides are preserved, so you can repeat this for other objects on the page. If there are any guides you don't want to keep, just slide them off the page – make sure your guides are not locked.
If you have selected more than one object and use the Shift-click method, the guides will be made at the borders of the first object selected. If you use the "rubber-band" method of selecting a number of objects, the guides will be at the borders of the oldest object. Once you group a number of objects, then the guides will be at the bounding box for the group, just as with a complex vector drawing.
setguides2object.py
The only error detection is for no document open, and no item selected. For shapes, polygons, and vector graphics, the guides will be created at the bounding box margins.
#!/usr/bin/env python
# -*- coding: utf-8 -*-

# Sets horizontal and vertical guides at the
# borders of a selected object
# preserves existing guides.
"""
setguides2object.py (c)2011 Gregory Pittman

This is a simple script that creates horizontal
and vertical guides at the edges of a selected object.
As written, it only uses one object, and preserves
any existing guides.
"""
import scribus

if scribus.haveDoc():
    try:
        f = scribus.getSelectedObject()
        xpos, ypos = scribus.getPosition(f)
        width, height = scribus.getSize(f)
        scribus.setHGuides(scribus.getHGuides() + [ypos, ypos + height])
        scribus.setVGuides(scribus.getVGuides() + [xpos, xpos + width])
        scribus.setRedraw(1)
    except:
        result = scribus.messageBox('Error', 'You must select an object')
        sys.exit(1)
else:
    result = scribus.messageBox('Error','You need a Document open')
setguides2inside.py
Here is a variant in which the idea is to make guides slightly inset from the borders of a frame or object.
#!/usr/bin/env python
# -*- coding: utf-8 -*-

# setguides2inside.py (c)2017 Gregory Pittman
# Sets horizontal and vertical guides inside the
# borders of a selected object
# preserves existing guides.

"""
This is a simple script that creates horizontal
and vertical guides inside the edges of a selected object.

As written, it only uses one object, and does not affect
any existing guides.

USAGE

Select object, run script. Dialog asks for percentage reduction

desired, default of 20%.
"""
import scribus

if scribus.haveDoc():
    reduction = scribus.valueDialog('Reduction amount','What percentage reduction would you like?\n(Number only)', '20')
    reduction = float(reduction)/200   # turning percentage into decimal value

    try:
        f = scribus.getSelectedObject()
        xpos, ypos = scribus.getPosition(f)
        width, height = scribus.getSize(f)
        scribus.setHGuides(scribus.getHGuides() + [ypos + reduction*height, ypos + height - reduction*height])
        scribus.setVGuides(scribus.getVGuides() + [xpos + reduction*width, xpos + width - reduction*width])
        scribus.setRedraw(1)
    except:
        result = scribus.messageBox('Error', 'You must select an object')
        sys.exit(1)

else:
    result = scribus.messageBox('Error','You need a Document open')

