Working with Master Pages: Difference between revisions
| Line 69: | Line 69: | ||
|[[Image:Master pages import.png|frame|left|Picture 5]] | |[[Image:Master pages import.png|frame|left|Picture 5]] | ||
|Next, click on the button '''Change...''' to search for the document containing the Master Page you would like to import. Then choose your Master Page, and click the ''' | |Next, click on the button '''Change...''' to search for the document containing the Master Page you would like to import. Then choose your Master Page, and click the '''Import''' button. | ||
|} | |} | ||
Revision as of 14:53, 27 November 2006
| Installation • Usage • PDF issues • Imposition • Other |
| Requirements: | |
| Operating system: | any |
| Scribus Version: | stable 1.3.3.* series |
| DTP skills: | novice |
Why master pages
| All Working with pages:
Working with text frames |
As soon as you consider using many objects (common headers, logos, background, page numbers etc.) on the same places throughout your document, you will be well advised to use master pages. You'll avoid some unnecessary drudgery and spare much time this way. The objects belonging to master pages cannot be changed in the normal Edit Mode. There as a good reason for it, since it could easily happen while working with a document that something on a master page would be unintentionally moved or changed. A master page always belongs to a document – it cannot be saved as a separate file. You can however create a sample file containing frequently used master pages and use it as resource to import master pages into other Scribus documents.
How to create master pages
Plan A:
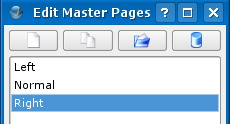
| Create a new document. Choose from the main menu Edit > Master Pages... (Picture 1) to launch the Edit Master Pages dialog and to change into the Master Pages Edit Mode (Picture 2). |
The master page Normal is always present and cannot be deleted – the delete button will be disabled, if the master page Normal is selected (Picture 2). The master page Normal can be edited, it's better though, to leave it empty to be able to insert new empty pages.
If you move your mouse over the buttons, you will see some helpful tooltips (Picture 2).
Beginning from the left side:
- New Master Page
- Duplicate Master Page
- Import Master Page
- Delete Master Page
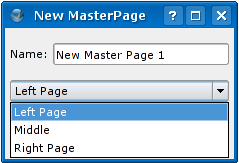
Clicking on the Button Add a New Master Page opens a window in which you may give your page a name (Picture 3).
Tip: try to pick a name that will have some meaning describing its purpose, so that if you haven't used it for a while, its name gives a clue.
| After you click OK you will see the window Edit Master Pages with your new Master Page highlighted. When you have a list of Master Pages you can then click from one to the next to edit each one as desired (Picture 4).
When you close the Edit Master Pages window, you return to the normal editing mode in Scribus. If you find that you need a Master Page similar to an existing one, click on Duplicate the selected master page rather than starting a new Master Page from scratch -- this can be a great time-saver. |
You can also copy a Master Page from another document by clicking on Import master pages from another document button, which opens the Import Master Page window (Picture 5).
| Next, click on the button Change... to search for the document containing the Master Page you would like to import. Then choose your Master Page, and click the Import button. |
Plan B:
|
You can also create new Master Pages from the page you are editing in normal editing mode. From the menu bar select Page > Convert to Master Page... (Picture 6). This opens a window entitled Convert Page to Master in which you may give this new Master Page a name (similar to Picture 3 above). Afterward, you may then go back to Edit > Master Pages... where you will find your new Master Page in the Edit Master Pages window (Picture 4 above). |
Double sided, 3-fold and 4-fold Pages
|
So how can we use these concepts with Double Sided, 3-fold and 4-fold document layouts? Actually, you will find that these are situations where using Master Pages is especially useful and time-saving. When you create a new document, select your desired layout(Picture 7). After this, create your Master Pages as explained above for Plan A or Plan B. To the right we see why the name chosen for a Master Page is especially important and helpful.
|
Applying master pages
To empty document pages:
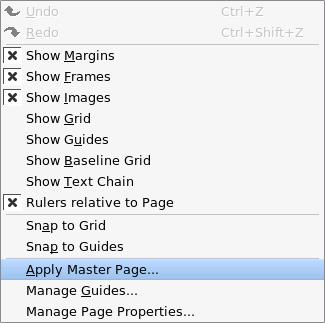
Selecting either Page > Apply Master Page... (Picture 7) or Apply Master Page... from the context menu (right-click on the page - Picture 11) opens up the Apply Master Page window. From this you may choose to apply the Master page to the:
- Current page
- Even pages
- Odd pages
- All pages
- and you may apply to a range of pages
Select the desired Master Page from the drop-down list labeled Master Page.
Perhaps not surprisingly, the option Even pages can only be selected when the document has more than one page. Also, applying to a range of pages only applies when you have selected All pages.
Inserting as a new page:
|
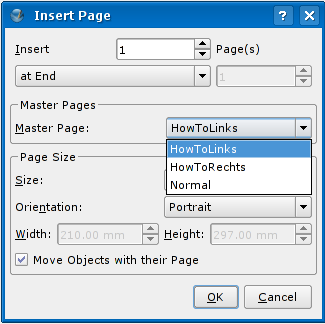
When you insert a new page (menu bar Page > Insert), you open up a window from which you can choose to add one or more pages, choose the place of insertion, and in addition decide whether these new pages will contain Master Page elements (Picture 13). Note that the Master Pages area expands according to your layout, so that in Picture 14 we see the appearance of an Insert Page window for a 4-fold layout. Hint: Page numbering is best accomplished with Story Editor. While you are in Edit Master Page mode, create a text frame with the appropriate location for your page numbering. From the Story Editor menu, select Insert > Character > Page Number (keyboard: Ctrl+Shift+Alt+P). This appears as # in the Story Editor window, but this is not Shift+3. For proper spacing, make at least 2 of these special characters when page numbering will be as high as 2 digits (10-99), at least 3 when page numbers need to be 100-999.
|
With many thanks to the original author, Roswitha Ott aka Uchiki, who kindly contributed the first German version of this howto to the Scribus Public Wiki.


