Graphical elements for presentations: Difference between revisions
Jump to navigation
Jump to search
C schaefer (talk | contribs) mNo edit summary |
No edit summary |
||
| Line 5: | Line 5: | ||
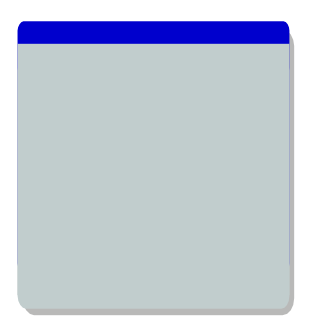
* Create a rectangular shape with the main colour and duplicate it. | * Create a rectangular shape with the main colour and duplicate it. Round the corners of the duplicate -- this is an adjustment in ''Properties > Shape''. Fill it with another colour (in our example: blue) and put it exactly behind the first rectangular with some offset at the top. The dialog ''Align and Distribute'' does a good job here. Duplicate it again, change the colour to the colour of the first rectangular and put it also behind the first rectangular – with a small offset from the bottom. Now we have got a textbox with rounded corners and a headline in another colour. Group all three rectangulars, duplicate the whole group and fill them with a shadow-like colour. Put this second group behind the first one, with a small offset to the right and the bottom (Ok, it looks a little bit like LateX Beamer …). | ||
[[Image:Presnt1.png]] | [[Image:Presnt1.png]] | ||
* A bubble is nothing but a combination of a | * A bubble is nothing but a combination of a rectangle with rounded corners and a manually drawn Bezier curve. | ||
[[Image:Presnt2.png]] | [[Image:Presnt2.png]] | ||
Revision as of 00:18, 13 August 2007
| Installation • Usage • PDF issues • Other |
Because of its PDF export, it's easy to produce presentations in Scribus. In the Extras tab of the PDF export dialog, visual effects for each slide transition can be defined. These effects are shown when the Acrobat Reader displays the PDF file in fullscreen mode. Modern presentations have some elements in common – here I'll show how to create some of them in Scribus.
- Create a rectangular shape with the main colour and duplicate it. Round the corners of the duplicate -- this is an adjustment in Properties > Shape. Fill it with another colour (in our example: blue) and put it exactly behind the first rectangular with some offset at the top. The dialog Align and Distribute does a good job here. Duplicate it again, change the colour to the colour of the first rectangular and put it also behind the first rectangular – with a small offset from the bottom. Now we have got a textbox with rounded corners and a headline in another colour. Group all three rectangulars, duplicate the whole group and fill them with a shadow-like colour. Put this second group behind the first one, with a small offset to the right and the bottom (Ok, it looks a little bit like LateX Beamer …).
- A bubble is nothing but a combination of a rectangle with rounded corners and a manually drawn Bezier curve.
- There are two ways to create arrows: a line with an arrow as its head/tail or using a shape. Among the different shapes you'll find some predefined arrows. Lines seem to be a little bit more flexible than the shape-arrows.
- Come on, that's just circles with numbers above them …
- I placed the header and the footer on a master page of that document, so they are appearing automatically on every page. The page number (Insert > Character > Page Number) is also set correctly that way.
(c) Thomas Zastrow, 2007
The content of this page is licenced under the Free Documentation Licence.


