Generating a Code39 Barcode: Difference between revisions
| Line 7: | Line 7: | ||
====Oh, Why Not?==== | ====Oh, Why Not?==== | ||
{| width=80% | | {| width=80% | | ||
|In keeping with the way that sometimes scripts keep getting things added, now we have added the ability to print human-readable characters under the code, | |In keeping with the way that sometimes scripts keep getting things added, now we have added the ability to print human-readable characters under the code, decided with a third dialog. This takes your entry, creates a text frame as wide as the code but 3 points below the bottom, enters the text, centers it, with an 8-point Deja Vu Sans Book font. | ||
I see examples where the numbers are more spaced out than this, but of course you can make this adjustment afterward according to your own taste, so it helps to have the frame be as wide as the entire code. This is another advantage of doing this as a script rather than with some outside utility that creates an image of the code. | I see examples where the numbers are more spaced out than this, but of course you can make this adjustment afterward according to your own taste, so it helps to have the frame be as wide as the entire code. This is another advantage of doing this as a script rather than with some outside utility that creates an image of the code. | ||
Revision as of 03:15, 3 August 2010
The reason for writing this script was that I had already written a script for modifying a form we use, and on this form are barcodes, one of which indicates the type of form, but the other is variable according to the content of the page.
The script creates that custom part, which has a 10-digit number, then underneath is the barcode. By trial and error I determined that this was a Code39 barcode. Unfortunately, the barcode generator in Scribus cannot be scripted, and in fact you cannot make a custom size for the barcode, so I was copying the 10-digit number, then running Barcode generator, then resizing the created code, which is a PostScript creation, so when it's resized, the width of the bars may change. So far it's been Ok, but this might affect the scanning process.
So here is a first attempt, code39.py. I had thought it was rather slow, but rechecking shows acceptable speed on various computers. This will only generate a code for digits and uppercase letters (plus the start/stop characters).
Oh, Why Not?
code39.py
#!/usr/bin/env python
# -*- coding: utf-8 -*-

# File: code39.py
# Based on postnet2.py originally 2006.03.06  Gregory Pittman
# this version 2010.08.01
# encodes numbers and letters, plus the start/stop character

"""
Simple operation.
First dialog asks for your code (numbers and uppercase letters),
as many characters as you want.
Second dialog asks for height of bars in points. Barcode is arbitrarily
created at X-Pos of 200, Y-Pos 100. (the relx, rely values)

"""

import scribus
import sys

# first the codes for numbers 0-9
code39 = ['nnswwn','wnsnnw','nwsnnw','wwsnnn','nnswnw','wnswnn','nwswnn','nnsnww','wnsnwn','nwsnwn']
# next add the codes for A-Z
code39.extend(['wnnsnw','nwnsnw','wwnsnn','nnwsnw','wnwsnn','nwwsnn','nnnsww','wnnswn','nwnswn'])
code39.extend(['nnwswn','wnnnsw','nwnnsw','wwnnsn','nnwnsw','wnwnsn','nwwnsn','nnnwsw','wnnwsn'])
code39.extend(['nwnwsn','nnwwsn','wsnnnw','nswnnw','wswnnn','nsnwnw','wsnwnn','nswwnn'])

startstop = 'nsnwwn'
narrow = 1.0   # narrow line width
wide = 2.2    # wide line width
b="Black"     #line color
relx=200      #Start X
rely=100      #Start Y
origx=relx

if scribus.haveDoc():
    S = scribus.valueDialog('Code 39','Enter Numbers or Uppercase Letters')
    height = scribus.valueDialog('Code 39','Enter Height of Bars (Points)')
    height = int(height)
    humanread = scribus.valueDialog('Code 39','Print Human-Readable Code Too?\n(Any change means no)', 'Yes')
    scribus.setRedraw(1)
    scribus.setUnit(0)

    code = startstop

    for x in S[0:]:
        if x.isdigit():
            xnum = int(x)
            code = code + code39[xnum]
        elif ((ord(x) > 64) and (ord(x) < 91)):   # ord(character) yields the ascii value
	    xnum = ord(x) - 55
	    code = code + code39[xnum]
        else:
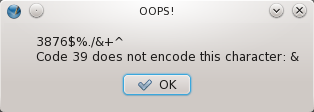
            scribus.messageBox('OOPS!','This script cannot encode this character: ' + x,scribus.ICON_NONE,button1=scribus.BUTTON_OK)
            sys.exit(1)

    code = code + startstop

    for y in code[0:]:
        if y == 'n':
            relx = relx + narrow/2
            d = scribus.createLine(relx,rely,relx,rely + height,) #narrow line
            scribus.setLineWidth(narrow, d)
            scribus.setLineColor(b, d)
            scribus.setFillColor(b, d)
            relx = relx + narrow + narrow/2
        elif y == 'w':
            relx = relx + wide/2
            d = scribus.createLine(relx,rely,relx,rely + height,) #wide line
            scribus.setLineWidth(wide, d)
            scribus.setLineColor(b, d)
            scribus.setFillColor(b, d)
            relx = relx + narrow + wide/2
        elif y == 's':                                      #for wide space
            relx = relx + wide
    if (humanread == 'Yes'):
        t = scribus.createText(origx, rely+height+3, relx - origx, 15)
        scribus.setText(S, t)
        scribus.setFont("DejaVu Sans Book", t)
        scribus.setFontSize(8, t)
        scribus.setTextAlignment(scribus.ALIGN_CENTERED, t)

    scribus.redrawAll()
Line Positions
Something worth mentioning here is that the precise position of the endpoints of lines is in the middle of the line. Thus, when I was creating lines of a particular width with very specific spacing in between, I had to account for the width of the lines or otherwise they would encroach on the space, and so you see these weird arithmetic additions in the if/elif loops.
About Code39
Code 39 is a widely used code consisting of a series of narrow and wide black lines, alternating with narrow or wide white spaces. Each character is denoted by a sequence of 5 lines and 4 intervening spaces, with a narrow space in between characters. The digits 0-9 and capital letters A-Z, plus *, hyphen, period, $, /, % and space are defined. The * character is also known as the start/stop character, since all codes should begin and end with it to orient the scanner.
Narrow and wide lines, and narrow and wide spaces have corresponding width values, and the relative ratios are generally 1:2.2 to 1:3 (narrow:wide).

