Working with Master Pages
| Installation • Usage • PDF issues • Imposition • Other |
Work in progress, to be translated!
| Requirements: | |
| Operating system: | any |
| Scribus Version: | stable 1.3.3.* series |
| DTP skills: | novice |
Why master pages
As soon as you consider using many objects (common headers, logos, background, page numbers etc.) on the same places throughout your document, you will be well advised to use master pages. You'll avoid some unnecessary drudgery and spare much time this way. The objects belonging to master pages cannot be changed in the normal Edit Mode. There as a good reason for it, since it could easily happen while woking with a document that something on a master page would be unintentionally moved or changed. A master page always belongs to a document – it cannot be saved as a separate file. You can however create a sample file containing frequently used master pages and use it as resource to import master pages into other Scribus documents.
How to create master pages
Plan A:
| Create a new document. Choose Main Menu-Edit-Master Pages (Picture 1) to launch the Edit Master Pages dialog and to change into the Master Pages Edit Mode (Picture 2).
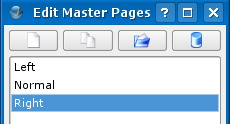
The master page Normal is always present and cannot be deleted – the delete button will be disabled, if the master page Normal is selected (Picture 2). The master page Normal can be edited, it's better though, to leave it empty to be able to insert new empty pages. If you move your mouse over the buttons, you will see some helpful tooltips (Picture 2). Beginning from the left side:
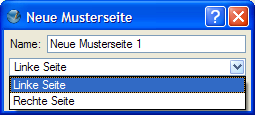
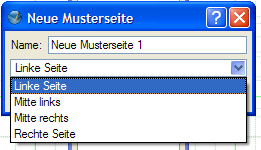
Clicking on the Button Add a New Master Page opens a window in which you may give your page a name (Picture 3). Tip: try to pick a name that will have some meaning describing its purpose, so that if you haven't used it for a while, its name gives a clue. After you click OK you will see the window Edit Master Pages with your new Master Page highlighted. When you have a list of Master Pages you can then click from one to the next to edit each one as desired (Picture 4). When you close the Edit Master Pages window, you return to the normal editing mode in Scribus. If you find that you need a Master Page similar to an existing one, click on Duplicate the selected master page rather than starting a new Master Page from scratch -- this can be a great time-saver. You can also copy a Master Page from another document by clicking on Import master pages from another document(Picture 5). Click on the button Change... to search for the document containing the Master Page(s) you would like to import. |
Plan B:
|
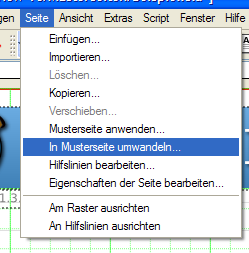
Die Objekte für die neue Musterseite im normalen Editiermodus einfügen. Anschließend über Menü-Seite-In Musterseite umwandeln eine Musterseite erstellen (Abb. 6). Auch hier erscheint das Fenster Neue Musterseite, in dem ein Name für die neue Musterseite vergeben werden kann (Abb. 3). Diese neue Musterseite taucht dann auch im Fenster Musterseiten bearbeiten auf (Abb. 4) und kann nur hier im Musterseiten-Editiermodus wieder geändert oder gelöscht werden. |
Double sided, 3-fold and 4-fold Pages
|
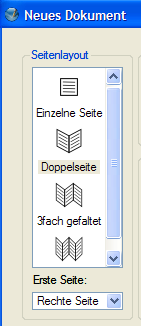
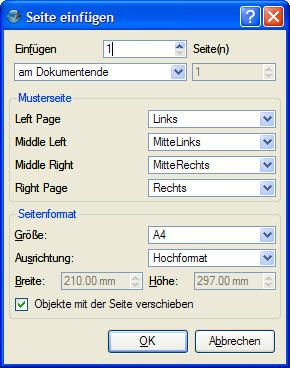
Wie funktioniert das bei Doppelseiten? Und bei 3fach und 4fach gefalteten Seiten? Eigentlich ganz genauso, man muß nur beim Anlegen des Dokumentes aufpassen, ob rechts oder links als erste Seite ausgewählt ist, damit beim Anwenden der Musterseiten auch die richtigen ausgewählt werden (Abb. 7). Beim Erstellen einer Musterseite für diese Mehrfachseiten kann man im Fenster Neue Musterseite gleich auswählen, für welche Seite die Musterseite erstellt werden soll. (Das gilt auch für das Duplizieren)
|
Applying master pages
Wie wende ich meine erstellten Musterseiten an?
To empy document pages:
|
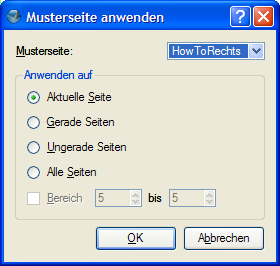
Über Menü-Seite-Musterseite anwenden (Abb. 7) oder Kontextmenü (Abb. 11) erscheint das Fenster Musterseite anwenden. Hiermit wird eine Musterseite
zugewiesen. Die gewünschte Musterseite mit dem Pfeil beim Feld Musterseite auswählen. (Abb. 12)
|
Inserting as a new page:
|
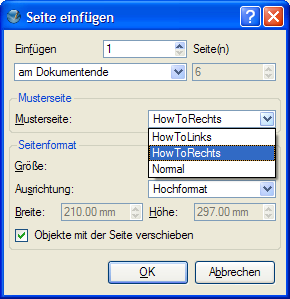
Über Menü-Seite-Einfügen werden neue Seiten eingefügt. Hier kann man wählen, wieviel Seiten eingefügt werden sollen, wo die Seiten eingefügt werden sollen, und ob die neue(n) Seite(en) leer (Normal) oder angewendete Musterseiten sein sollen. Auswahl der gewünschten Musterseite über das Feld Musterseite (Picture 13). Bei Mehrfachseiten ist das Fenster Seite einfügen um die Auswahl der jeweiligen Seitenposition erweitert (Abb. 15). Hier nur das Beispiel einer 4fach-gefalteten Seite. Hint: Seitenzahlen (#) fügt man auf eine Musterseite am Besten über Storyeditormenü-Einfügen-Zeichen-Seitenzahl ein. Ab der Seite 10 müssen zwei ( ##) Seitenzahlen da sein, ab der Seite 100 drei (###) etc. Genau das Richtige um Musterseiten zu duplizieren!
|
With many thanks to the original author, Roswitha Ott aka Uchiki, who kindly contributed the first German version of this howto to the Scribus Public Wiki.


