Creating a fancy border
Here you'll find out how to create a text frame with a fancy border.
Prerequisites
This function currently only works in Scribus 1.5.0svn.
Before attempting this tutorial you are expected to already know how to perform the following actions:
- Create a blank document.
- Open and navigate the Properties tool.
- Create a text frame.
- Put text in a text frame.
- Create a basic shape (rectangle, circle, arrow, etc.).
- Change the properties of a shape (line width, color, etc.).
You may also want to know about the following:
- Altering the distance of text from the text frame.
Your first fancy border
Create a new blank single page document.
Open the Properties tool (if it has not automatically been opened).
Create a new text frame near the centre of the document, make the frame about half the width of the page and reasonably square.
Add some text to the frame.
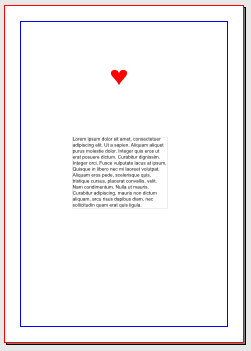
Create a new shape above the text frame, about half way between the text frame and the top of the page. Make the shape about a fifth of the width of the text frame. In this example an arrow has been used to better show how things work. The spacing and sizes recommended here are only for demonstration purposes. Feel free to give the shape some color so you can better see the effect of the repeated pattern.
You should have a document that looks something like that on the right.
Mouse over the shape, right-click, and select Send to Patterns from the context-sensitive menu. This takes the shape (or any other image) that you've selected and copies it into the Patterns repository. The original shape remains but can be deleted if you don't think it will be needed later.
A small dialog box will appear asking you to name the new pattern. You can either accept the name automatically created by Scribus or type your own more descriptive name. Press OK either way when you're ready to continue. The new pattern has now been created. You can see all of the patterns available to the document by using Windows > Symbols.
Select the text frame and, in the Properties tool, select the Colors tab.
Select the Stroke mini-tab and select Pattern from the Stroke Mode drop down box. Note: Pattern will not be available as an option if you have no patterns.
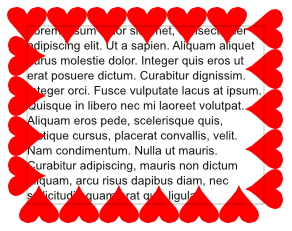
Select the pattern you have just created, then check the Pattern follows path box to make the pattern visible. You should now see your pattern repeated around the text frame as a fancy border similar to the image below.
Problems?
You will probably notice that the repeated pattern is obscuring some of your text. If this is the case you can use the Text tab in the Properties tool to alter the gap between the text and the frame outline.
You will probably also see that either:
- the pattern doesn't go all the way round the text frame, or,
- the pattern overlaps at the one or more corners.
This is because Scribus can only handle whole patterns, not parts of a pattern. It draws the pattern round the outline of the text frame, starting at the top left corner, following the frame clockwise until it has run out of frame. Therefore, sometimes the repeated pattern doesn't reach the end of the frame, or it can overlap when it comes back on itself.
There are two main ways you can try to alleviate this:
- you can change the properties of the repeated pattern, or,
- you can change the pattern itself.
Below we'll look at each of these options in sequence.
Changing the properties of the repeated pattern
Here we'll look at changing the properties of the repeated pattern to see if you can achieve your desired result.
Select the text frame, if it's not already selected.
Select the Colors tab in the Properties tool and select the Stroke mini-tab.
Under the pattern selector you'll find a button called Properties.... Press this button and you'll be given a new dialog box in which you can change different aspects of the repeating pattern.
Offsets: Use these to change the positioning of the first, and subsequent patterns. Changing the X Offset property tells Scribus to start drawing the first pattern at the given amount to the right or left of the top left of the frame. Changing the Y Offset property tells Scribus to start drawing the first pattern at the given amount above or below the top left of the frame.
Scaling: Use these to change the horizontal and vertical scale of the pattern. Select the "linked chain" icon to change the two properties together.
Rotation: Use this to rotate the pattern about it's centre point.
Skewing: Use these to skew the pattern either horizontally, vertically or both.
Spacing: Use this to change the space between each instance of the repeated pattern.
Flip: Use these buttons to flip the pattern either horizontally or vertically.
Note: Changing the properties of the pattern here does not alter the original pattern.
Try changing some of these properties to see if you can achieve a pleasing effect.
Press the Close button of the dialog box to go back to your document.
If you've tried changing the properties of the pattern and still don't like the result you can try the next option.
Changing the pattern
Here we'll look at changing the pattern itself.
Open the Symbols dialog box with Windows > Symbols. You'll see a palette of patterns available to the document.
Double click the pattern to see it in an editing window.
Select the pattern in the editing window and change the magnification (either by using the relevant icons - as you would when editing a document - or with the View menu) so you have a good clear view of the pattern.
In the editing window you can manipulate the pattern as you would normally manipulate any shape in a document.
Try changing the pattern in some way; stretch it, change its outline, change its color, or anything you want.
To save the changes close the editing window (not the main Scribus window).
Note: There is currently no "cancel all changes" option when editing a pattern, however the Undo feature is available.
You should see your changes reflected in the Symbols dialog box, the patterns palette of the Properties tool and the document itself.
If you're still not satisfied, try changing the properties of the new repeated pattern as shown in the previous instructions.
What if it's still not right?
Getting the repeated pattern looking just right can sometimes be quite difficult. Depending on what pattern you've chosen you could end up making lots of changes.
With this in mind, here are some general tips for using fancy borders:
Use a small pattern
The smaller your pattern is the more likely it is that you'll be able to get it looking good as a frame border.
A small pattern will be repeated many times around the text frame and as such it may be easier to fine-tune the result.
Use a tall pattern
If your pattern is much taller than it is wide you may find it easier to manipulate to get good results.
Wide patterns tend to create large gaps (or overlaps) at the frame corners which are difficult to remove.
Use relative frame and pattern sizes
As you've probably already noticed, as Scribus draws the pattern round a frame, when it has completed the top horizontal line it rotates the shape 90 degrees then continues down the right of the frame, and then the same for the bottom and left of the frame.
Also, when you use the Pattern follows path option you might have noticed that the first pattern is drawn with its centre on the top left vertex of the text frame outline, with subsequent patterns following the frame outline.
If your text frame width and height are both multiples of the pattern width it can help to insure that Scribus can draw the pattern without corners looking strange.
Rounded frame corners
If you give the frame rounded corners (Properties tool, Shape tab) you can get some unusual effects.
Why not give it a go and see how it looks?
Final note and gallery
Whatever you do though, experiment and have fun with this feature.
Try using different shapes, images, anything. If you can use the Send to Patterns menu item with something you can use it as a pattern for a border.
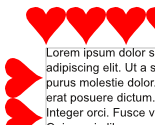
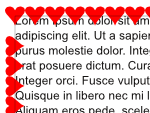
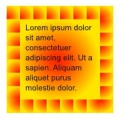
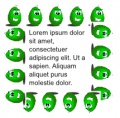
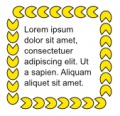
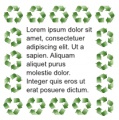
You might be surprised at what sort of things you can create. Have a look at the gallery below for some inspiration:
