Creating custom image frames with GIMP and Inkscape
| Installation • Usage • PDF issues • Other |
This tip shows you how you can create custom image frames fairly easily using GIMP and Inkscape.
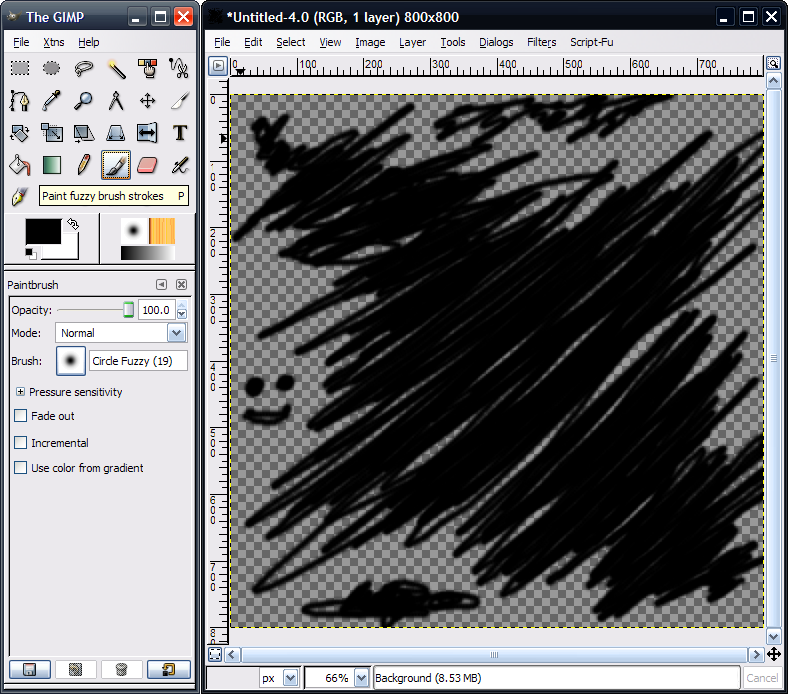
Step 1 (GIMP) Open Gimp and create a new document in Gimp with a transparent background.
Step 2 (GIMP) Select black (#000000) as your foreground color and paint your frame onto the canvas. Then save your file as MyFrame.png or something like that.
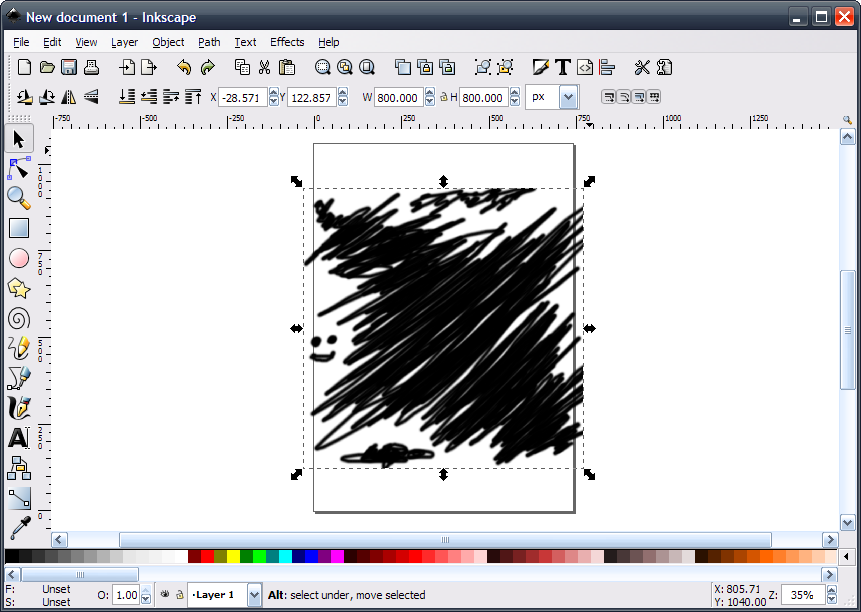
Step 3 (Inkscape) Open Inkscape, create a new document, and either drag and drop your MyFrame.png file onto the Inkscape canvas, or use the File->Import... menu item to import the image.
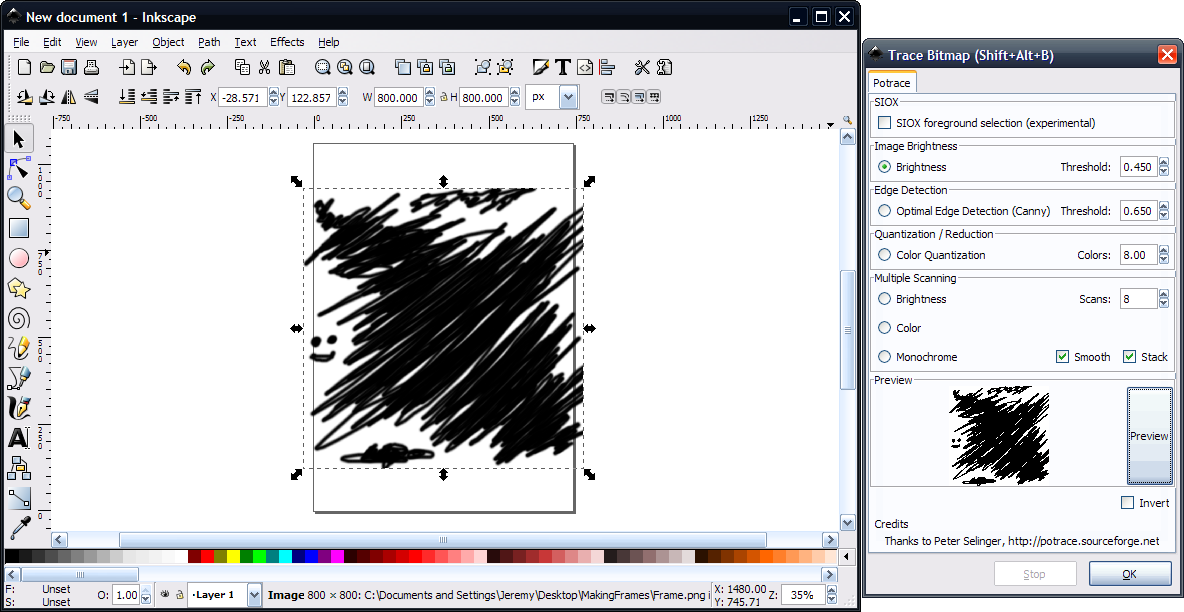
Step 4 (Inkscape) With the image selected, use the Path->Trace bitmap... menu option. Select the Brightness radio button in the Image Brightness section at the top, then press the OK button at the bottom. Close the Trace Bitmap window. A vector version of your frame image should now be in the main Inkscape window, although it might be hard to see it at this point.
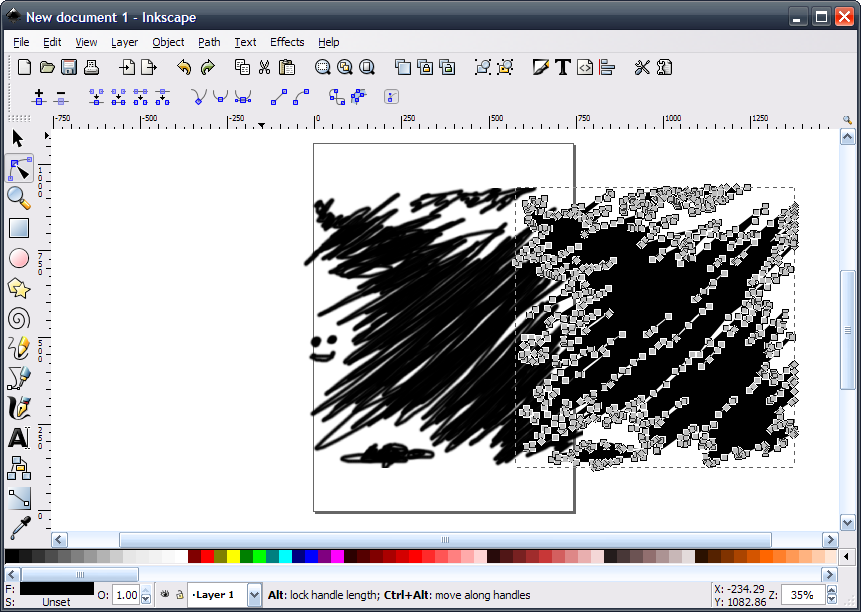
Step 5 (Inkscape) Click the vector object and drag it to the side. Just to be sure you got the right object, click on the "Edit path nodes or control handles" tool (a black arrow with three blue squares on a blue arc). The object you just dragged should now have lots of little grey squares on it, proving that it is the vector object. Click on the "Select and transform objects" tool again (the black arrow). The grey squares should go away. Now click the other object (your imported image) and delete it by pressing the Delete key
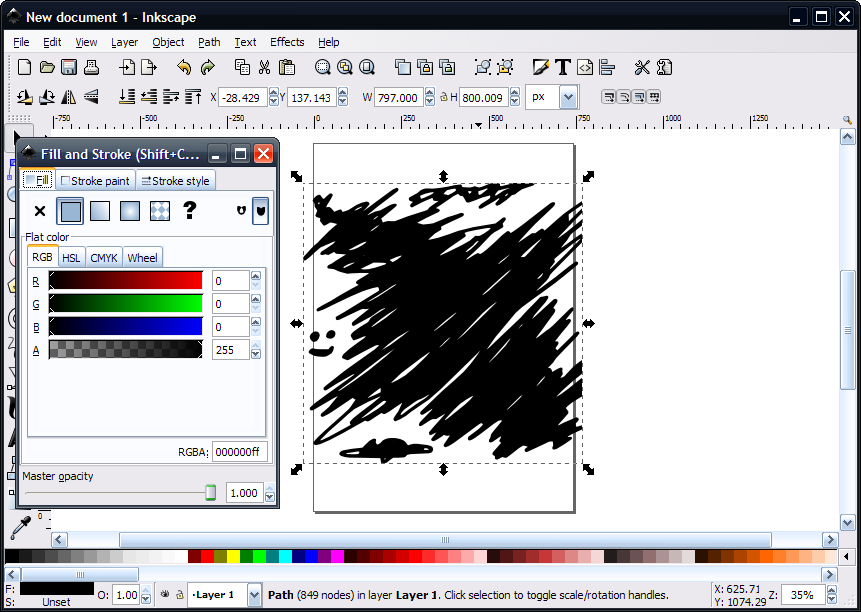
Step 6 (Inkscape) Now you should just have the vector object on screen. So select it, and select the Object->Fill and Stroke... menu item. On the "Fill" tab, make sure the "Flat Color" box is selected, and set the "Flat Color" in in the RGB area below to Black (R: 0, G: 0, B: 0, A: 255).
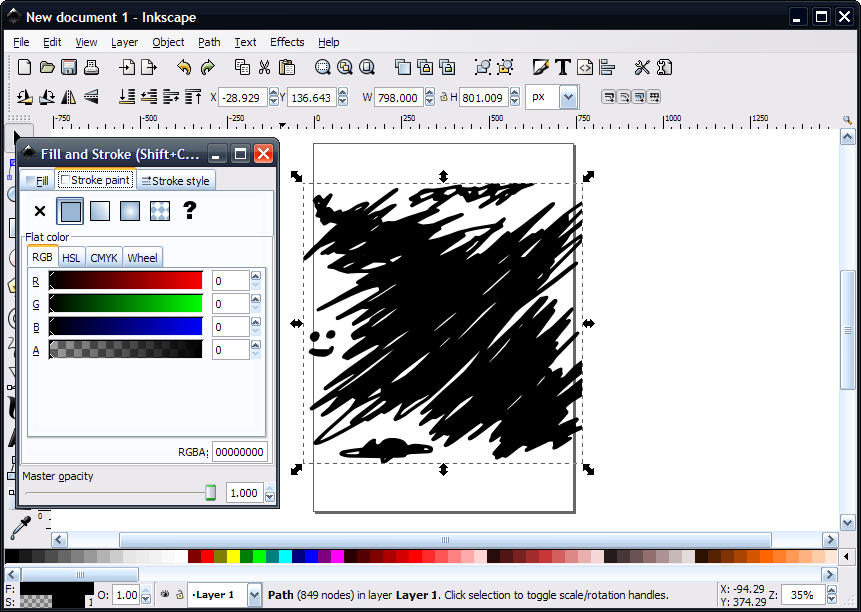
Step 7 (Inskcape) Then, under the "Stroke Paint" tab, select the "Flat Color" box and set the color in the RGB section to Black with 0 Alpha (R: 0, G: 0, B: 0, A: 0). If you don't do this, you'll end up with an ugly line around the frame in Scribus. After that, save the document as MyFrame.svg or something like that.
Step 8 (Scribus) Open your Scribus document and use the File->Import->Import SVG... menu item to open your MyFrame.svg file. Use the red control handles or the Properties toolbar to scale it to the size you want.
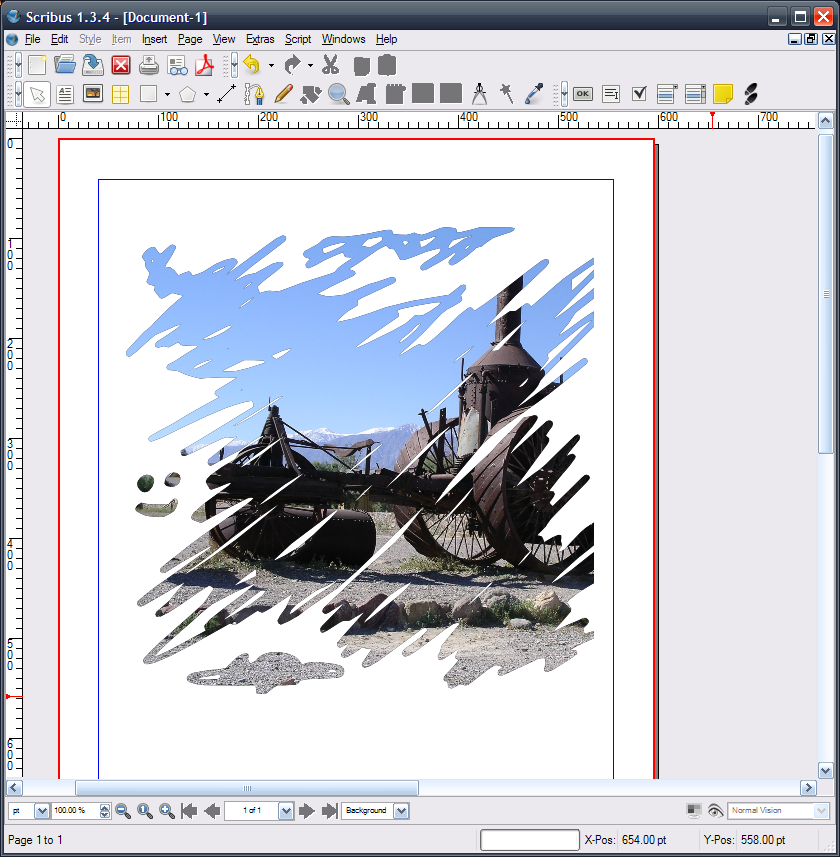
Step 9 (Scribus) If the Item->Combine Polygons menu item is available, use it. After that, use the Item->Convert To->Image Frame menu item. The imported MyFrame.svg object should now be usable as an image frame. Use Ctrl+D or Right-Click->Get Image... to set the image file to be used. Then scale the image to the size you want. I'm sure you can come up with much better frames than this one, so get started!

