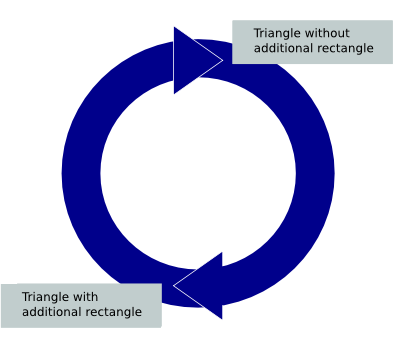
A diagram in circle style, often useful for presentations. It uses combined and grouped polygons and other elements, duplicating, a lot of rotating and the Attach Text to Path function.

- Create two round shapes, one of them needs to be a bit smaller than the other. Keep a copy of the smaller circle – you'll need it later for creating the text! To make an exact copy, select the circle, pressing Ctrl-C and then Ctrl-V, and now move the smaller circle. You will find there are two on top of each other. Hint: Holding down the Shift key as you make your circle keeps it from being an ellipse.
- Put one of the smaller circles in the middle of the bigger one. Now select both circles (you can do this by clicking and dragging a selection box around the two circles). Next, in the menu bar, use the command Item > Combine Polygons. This combines the two and creates a ring. Set the stroke color to "None" and the fill color to whatever you like.
|

|

|
- Now, we build the arrows. Create a new triangular shape and use the same fill color you applied to the ring. Set the stroke color to white.
|
- Rotate the triangle, so that it points to one of the four directions we'll need
- Place the triangle at its correct position above the ring.
- To hide the triangle's white stroke above the ring on the triangle's long side, just draw a small, filled rectangular shape without the stroke's color above the triangle.
- Group the triangle and the rectangle, create three duplicates, rotate the duplicates so that they are pointing to the four directions and place them above the ring.
|

|

|
- Now we add the text, using the copy of the small circle you made, but consider that you may want to go to Properties > Shape > Edit Shape to slightly enlarge it, since what you actually want is your text on an imaginary rim slightly larger than the smaller circle. Convert it to a Bezier curve. Create a text frame with your text and use Item > Attach Text to Path. Move this text until it has its the correct position on the ring. You may need to adjust font size and spacing until it fits perfectly, and you can also further edit the circle after you have applied the text.
See Text on a Path if you need more help.
|
- The text on the path is still editable – create three copies of the first text-on-path item, use the Story Editor to edit their content and move and rotate until the texts are all in the desired place above the ring. Once you have completed this project, select them all, then Item > Group to then place the entire ensemble precisely where you want it.
|

|
- Now that you've gone through this process, remember that Scribus may offer more than one way to accomplish your end result. For example, we could have started with a single circle shape, made the fill color None, made a copy for our Text on Path work, then increased line width of the original to a large number, say 40 to 50 pts, then added the triangles. We could also have done all the text at once in a long string, adding spaces in between word groups as needed to get them spaced properly around the circle. Neither one of the methods is inherently any better, though one may seem easier for you.
|
(c) Thomas Zastrow, 2007
The content of this page is licensed under the Free Documentation License.


