Render frames and the LaTeX listings package
A recent question on the Scribus mail list related to a desire to make some posters with Scribus which depict programming code, and to be able to show syntax highlighting. Various solutions were proposed, but the original poster wanted to try to use LaTeX in a Render frame to accomplish this, and met obstacles he could not sort out.
Finally, with some additional advice, and some hours of working on this, this was sorted out, using the LaTeX package listings. It's also worth adding that in order to show syntax in color you also must use the color package. What follows here is an explanation of the process, using a Python script as an example. Much of the time was spent using LaTeX outside of Scribus in order to get the syntax right from a LaTeX perspective, but also to be able to compare the end result with the Scribus/Render frame method.
bcaption.py
Here is the script we'll work with:
#!/usr/bin/env python
# -*- coding: utf-8  -*-

# ****************************************************************************
#  This program is free software; you can redistribute it and/or modify
#  it under the terms of the GNU General Public License as published by
#  the Free Software Foundation; either version 2 of the License, or
#  (at your option) any later version.
#
#  This program is distributed in the hope that it will be useful,
#  but WITHOUT ANY WARRANTY; without even the implied warranty of
#  MERCHANTABILITY or FITNESS FOR A PARTICULAR PURPOSE.  See the
#  GNU General Public License for more details.
#
#  You should have received a copy of the GNU General Public License
#  along with this program; if not, write to the Free Software
#  Foundation, Inc., 59 Temple Place - Suite 330, Boston, MA 02111-1307, USA.
#
# ****************************************************************************


"""

© 2017 Gregory Pittman

bcaption.py

Creates a text frame (caption) below one or more selected frames.

"""

try:
    import scribus
except ImportError:
    print "Unable to import the 'scribus' module. This script will only run within"
    print "the Python interpreter embedded in Scribus. Try Script->Execute Script."
    sys.exit(1)

numselect = scribus.selectionCount()
count = 0
frames = []

if numselect == 0:
    scribus.messageBox('Selection Count', "You must have at least one image frame selected",
                       scribus.ICON_WARNING, scribus.BUTTON_OK)
    sys.exit(2)
pageunits = scribus.getUnit()
scribus.setUnit(scribus.UNIT_POINTS)

while count < numselect:
    frames.append(scribus.getSelectedObject(count))
    count += 1

for frame in frames:
    fwidth, fheight = scribus.getSize(frame)
    fx, fy = scribus.getPosition(frame)
    textf = scribus.createText(fx, fy+fheight, fwidth, 24)

scribus.setUnit(pageunits)

scribus.setRedraw(True)
Something I found out quickly was that listings had a lot of trouble with the extended comment with the copyright information, and also the USAGE section of the script. Since these were hardly desired, they were deleted. After a great deal of trial and error, fussing and fuming, here is the end result that worked pretty well to my liking:
listings_example.tex
\documentclass{article}
\usepackage{listings, color, tgheros}
\setlength{\textwidth}{18cm}
  \setlength{\oddsidemargin}{-1cm}
  \setlength{\topmargin}{-1.5cm}

\begin{document}
\lstset{
  basicstyle=\sffamily,
  keywordstyle=\color{red},
  commentstyle=\color[rgb]{0,0,0.9},
  showstringspaces=false,
  }
\begin{lstlisting}[language=Python]
#!/usr/bin/env python
# bcaption.py

try:
    import scribus
except ImportError:
    print "Unable to import the 'scribus' module. This script will only run within"
    print "the Python interpreter embedded in Scribus. Try Script->Execute Script."
    sys.exit(1)

numselect = scribus.selectionCount()
count = 0
frames = []

if numselect == 0:
    scribus.messageBox('Selection Count', "You must have at least one image frame
          selected", scribus.ICON_WARNING, scribus.BUTTON_OK)
    sys.exit(2)
pageunits = scribus.getUnit()
scribus.setUnit(scribus.UNIT_POINTS)

while count < numselect:
    frames.append(scribus.getSelectedObject(count))
    count += 1

for frame in frames:
    fwidth, fheight = scribus.getSize(frame)
    fx, fy = scribus.getPosition(frame)
    textf = scribus.createText(fx, fy+fheight, fwidth, 24)

scribus.setUnit(pageunits)

scribus.setRedraw(True)
\end{lstlisting}

\end{document}
Everything down to, but not including the line \begin{lstlisting}... is the preamble, which is important to recognize as we adapt this to Scribus and render frames. Under \usepackage is specified listings, color, and also tgheros, which is a particular sans font family, Tex Gyre Heros, which I found to my liking. You may not have the listings package on your system, and perhaps not the others. As you try to process this with latex or pdflatex you will find out with the feedback you get. There are 3 settings I also made with \setlength that have to do with placement of the result on the PDF page. These will have no effect in Scribus, since the ouput will go to the top and left margins of the render frame.
After \begin{document} there is a section \lstset{}, very important as we try to modify the appearance of our output. Both outside and inside Scribus, I was unhappy with the result of using either a roman family (\rmfamily) or texttype (\ttfamily), so I specified \sffamily for sans-serif. I decided that I wanted the Python keywords to be red and comments a blue but not so bright a blue, so here you see two methods for specifying color, by name or by RGB value. A final important spec was to not show a character where spaces were in strings in the code (such as in 'Selection Count'). For other whitespace in the code, the default is to simply show whitespace.
Between \begin{lstlisting} and \end{lstlisting} is our Python code, to be interpreted by the listings package.
Moving to Scribus
Now we'll see how this translates to our mode of using Render frames in Scribus.
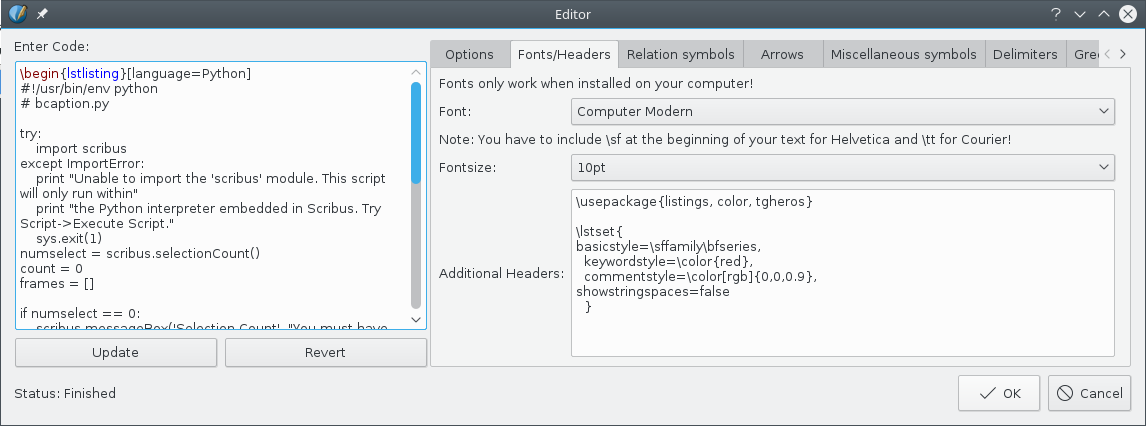
After you create a Render frame (and hopefully, you will see the sample result correctly), right-click the frame and select Edit Source, which brings up the above dialog. Under the Fonts/Headers tab we have a text area for all the preamble information after clearing out the space. Notice that you do not need \documentclass{}, \begin{document} or \end{document} in Scribus. Something to notice also is that I have added \bfseries to the basicstyle information – I'll explain this later.
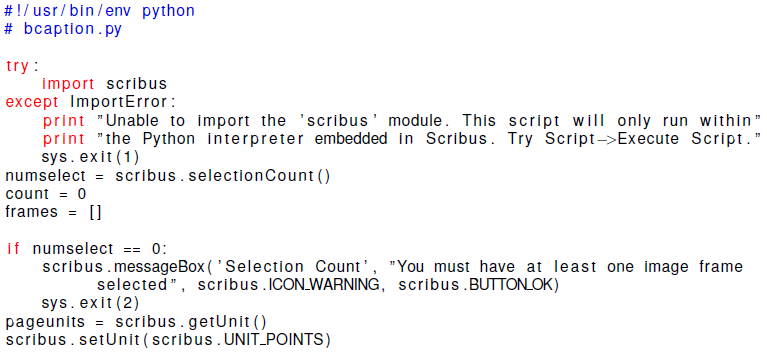
In the left text area we place the entire \begin{lstlisting} section, down to and including the ending line \end{lstlisting}. Click Update and then OK to exit the dialog. Here is what we then get on the canvas in Scribus.
You're likely to be disappointed in the appearance as far as resolution, and changing settings won't make any difference. You won't actually know how good it looks until you export to PDF, and admittedly this is an impediment while you're using Scribus. I would also add that there was a LOT of back and forth with editing of the Python lines, because you get no word-wrap – the text just disappears off into infinity to the right if the line is too long. This is true outside of Scribus as well, and I think it relates to the literal way that the listings package interprets the code.
Two methods: Head-to-Head
Now that 1.5.x versions of Scribus include the ability to import PDFs as vectors, it's reasonable to ask how this compares with the Render frame method, since we might just run pdflatex outside of Scribus and import the result, or even use that PDF all by itself. We would still have some advantages in Scribus of adding other page elements and refining placement more precisely and easily.
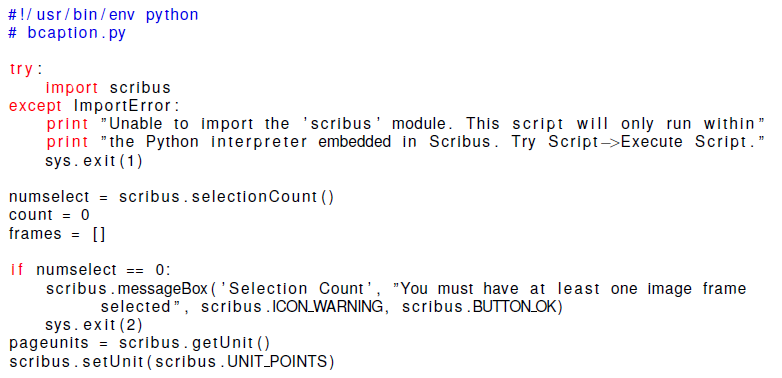
Below we see both methods as shown in screenshots from Adobe Reader at 100%. On top is the Render frame method, on the bottom, pdflatex outside of Scribus.
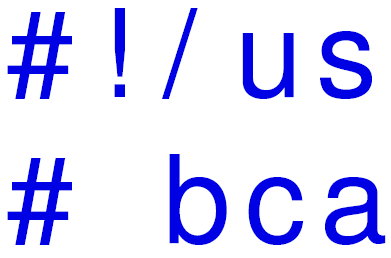
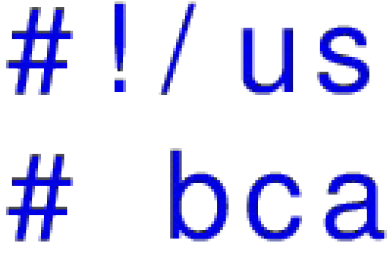
Let's look further though, by showing each example at 800% zoom, and we'll see an important point about settings on export to PDF. We have 3 examples below – to the left is Render frame method with Embed PDF & EPS files checked in the PDF Export dialog. In the middle is the pdflatex output outside of Scribus, and to the right is the Render frame method with Embed PDF & EPS files unchecked in the PDF Export dialog. The left and middle examples look pretty comparable, though the one on the right speaks for itself. These Render frame examples did not have the \bfseries modifier set.
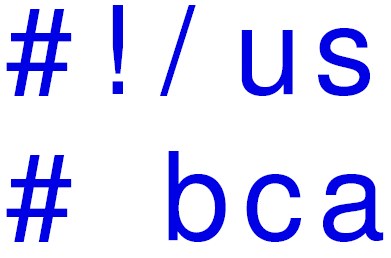
Render frame method - Embed PDF on export checked |
pdflatex method |
Render frame method - Embed PDF on export unchecked |
So here we see how this syntax highlighting can be done using a Render frame, in comparison with at least one other alternative.
