Adding typographic spaces to fonts with FontForge
Note
Some text has been added since the first version, see bottom of the page if you have problems, it gives a slightly different way of doing the necessary manipulations that's a bit more "secure".
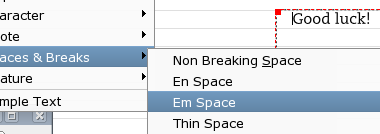
At the time I write this, Scribus, in date of 26 February 2006, has just been added menu inputs for the most used typographic spacings:
- the EM space, measuring M/1 (an em divided by one);
- the EN space, measuring M/2;
- the M/3 thick space
- the mid space which measures M/4;
- the thin space, measuring M/5;
- and last but not least, the very small M/24 hair space.
You might have found yourself using fonts that, sadly, do not support those characters. I write this guide with the intent of showing you how to edit your fonts to make use of these features possible. In this case, I will be editing one of my favourite: Caecilia Roman by Linotype.
To begin with, you will need a font file and (in this case solely but not limited to) the FontForge editor, which is available under most platforms and is free. Please make sure that your font license allows modifications, don’t assume they do because it’s really not the case.
Start with making a backup of your font. While FontForge doesn’t edit font files directly, I wouldn’t take any chance overwriting by error my precious fonts when exporting the fresly edited font.
Now that you have done this, launch FontForge. By default, the application will ask you to open your font file. Locate the one you will be editing and click Okay. You might get some warnings at opening, this is generally not important and should work very well anyway.
If your imported font is not using Unicode encoding, I suggest you re-encode it with Encoding, then Reencode and finally select any of both Unicode format, BMP will do for most uses.
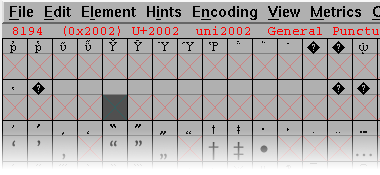
In the menu, select View and then Goto. Enter uni2002 and click Okay. Now, the Unicode character 2002, which is the EN space, should be selected.
I will explain what is what in this image. The text in red displays the current characted selected, in this case the 2002. The highlighted character currently has an red cross in it, indicating that this character is not currently included in the font. Now, double-click on it, it should open a new window.
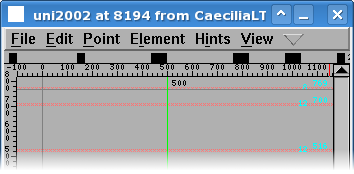
There is a vertical line, the green one in this image, that by default should be located to 1000 and be black. Grab it and move it to 500. You move it to 500 because this character, the EN space, is M/2, where M=1000, thus 1000/2.
If you have problems moving it precisely with the mouse, you can move it by 1pt increments with the arrow keys. The character on the map you have first opened when importing the font should now have a black header and there also should not be the red cross anymore. That’s all you had to to edit the EN space. Easy, heh? Now you will do the same on every character that remains to be edited with the following units:
- EM space at uni2003, 1000 (move it and put it back in place to enable it);
- thick space at uni2004, 333;
- mid space at uni2005, 250;
- thin space at uni2009, 200;
- hair space at uni200A, 42.
After you have done this, all that remains is exporting and/or saving your file. If you wish to further edit the file after a close, go to the File menu, and select Save As. This might be handy for future addings/changes to the font. To export your font use File, Generate Fonts. In the dialog, enter the desired name, I personally use the original name and add “_EDITED” just before the extension. I personally always use the OpenType CFF type, so I cannot tell about other types. If your original font was a PostScript or TrueType, do not worry since OpenType can use both vector formats. Click on Save and the file is exported.
Now all that remains to be done is uninstalling the previous installed font and replace it with the new one. Do not simply install it with the original still there, because Scribus will invariably only load just one version of the font at a time.
You are now done! If you have any question or comment, do not hesitate to post it here, I will be happy to answer the best I can!
Class is over people! Have a nice day!
--Pierre-Luc Auclair 20:03, 13 March 2006 (CET)
Update
Some people have said they were having problems with their converted fonts. From what I gather, there are ?scripts? that can’t get converted from format to format. Here’s another way I have found that works well too, if you have read the tutorial you should not have any problems following these few steps:
- Do not re-encode your font;
- Insert the desired number of glyph slots with Encoding, Add Encoding Slots;
- Right-click on the new glyph, enter the code in Unicode Value (for example U+2003), then choose the Unicode Name from the list;
- Edit the glyph with the correct values;
- Save with the original file format.


