Help:Manual Frames
Working with Frames
Working with Scribus is for the most part working with a frames environment. Some more generic terms you may see in menus and commands are objects or items, of which frames are one kind of object or item. There are five kinds of frames you will work with in Scribus:
Each of these have their own section in this online manual, but here we will explain features they share.
Creating Frames
There are at least six ways to create frames:
- Clicking the toolbar icon for the type of frame
- Choosing from the menu, Insert > Type of frame
- Using the keyboard shortcut (when not in Edit Contents mode in an already existing frame)
- T for Text frame
- I for Image frame
- D for Render frame
- S for Shape
- P for Polygon
- Using Duplicate or Multiple Duplicate to make one or more copies of the selected frame
- Duplicating a Layer with its contents
- Copying a page, with all of its contents
Context Menus
Each frame type has its own particular Context Menu, found by right-clicking on it. Since these are variable depending on the type of frame, they will not be elaborated upon here. Keep in mind that you can find interesting things in Scribus by right-clicking on various items.
Manipulating Frames
How to Use Spinboxes
Rotating Frames
There are 2 ways to rotate a frame:
- Click the Rotate icon on the toolbar. You then click-drag inside the frame to rotate. As long as you click inside a frame, the basepoint is always the center of the frame. However, if click on any of the corner handles, the basepoint is the opposite corner.
- Use the Rotation spinbox in Properties. In this case, you can choose the basepoint around which rotation takes place, as well as have more precision.
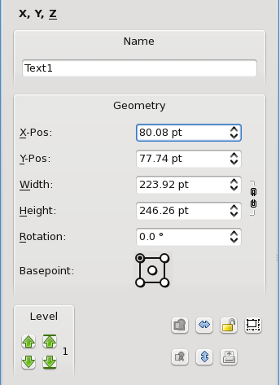
Moving Frames – Level to Level or Layer to LayerYou can move up or down levels using Properties > X,Y,Z tab, in the area labelled Level, either one level at a time or to the top or bottom. The number beside these arrows tells you which level your object is on (1 is the bottom).There are also keyboard shortcuts:
Final Section of Properties: X,Y,ZLooking at the last group of seven buttons in the lower right corner of X,Y,Z, the two leftmost buttons, grayed out in this picture, will group and ungroup a collection of selected objects (note that vector drawings are always imported as groups of objects). The next two buttons, with the blue arrows, flip the object horizontally or vertically. The picture of the lock is where you can lock or unlock the selected object, and just to its right you can lock or unlock only the size of the object. The last button in the lower right corner enables is disables printing (and export to PDF) of the object. |  |
Copy, Cut, Paste, Delete
Most users should be familiar with these kinds of operations common to many types of editing software. They can be found in the Context Menu or the Edit menu, and have the standard keyboard shortcuts of Ctrl+C, Ctrl+X, Ctrl+V, and Del. In Scribus, Delete operates similar to Cut, since it can be undone, but in contrast is not copied to the clipboard and therefore cannot be pasted. If you move from one page or one layer to another, Paste will place the new copy at the same coordinates it had on the original page or layer.
Selecting Multiple Frames
You might do this as a prelude to grouping the frames, so you can move or scale them as a unit.
The simplest way of selecting a group of frames is to click-drag around them. You have to be sure that any frame you wish to be selected is fully within the temporary rectangle you see during this operation. This may not work when you only want some of the frames in a particular rectangular space. In that situation you can manually select additional frames in a cumulative way by holding down Shift as you click. If you make a mistake, click again while holding Shift to deselect individual frames. If you have not yet grouped the frames, click outside these collectively selected frames to "break" the multiple selection. You can also combine these approaches by click-dragging around a number of frames, then Shift-clicking any you wish to select in addition or deselect.
Selecting Frames Under Other Frames
If all you want to do is select an individual frame that happens to be completely underneath some other frame, hold Shift+Ctrl, and click serially on a particular spot to toggle through the frames covering that spot. You will cycle through the frames, but also at some point select none of them.
Note: if you find an inability to select a frame underneath another using this method, consider that this frame may be on another layer. You may only work on one layer at a time.
Line and Colors of Frames
The line of a frame is the border. For text, image and render frames, the default color of the line is None, so none of the line settings have any meaning until the line is given a color in the Colors tab of the Properties Palette. The default background or fill color of text and image frames is also None.
For Shapes and Polygons, the default fill color is set to None, wheras the default line color is Black. For all kinds of frames these default colors can be set in File > Document Setup > Tools for the current document and in File > Preferences > Tools for new documents.
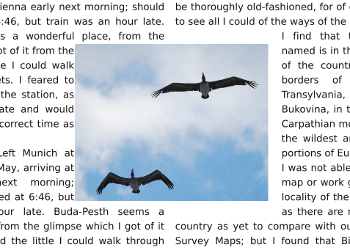
Text Flow Around Frame
| This material may be distributed only subject to the terms and conditions set forth in the Open Publication License, v1.0 or later. Distribution of the work or derivative of the work in any standard (paper) book form is prohibited unless prior permission is obtained from the copyright holder. A copy of the license is included in the section entitled "Text of the Open Publication License." |


