How to create a Pop Art Explosion
| Installation • Usage • PDF issues • Imposition • Other |
Button … Menu → Choice … Keyboard
Introduction
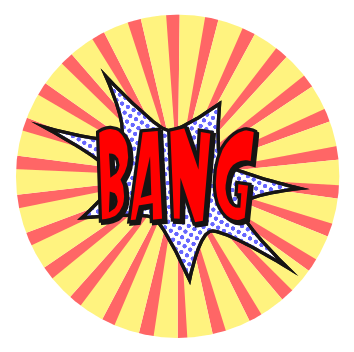
This tutorial will show you how to create a pop art explosion.
Specific techniques used in this tutorial
- Creating shapes.
- Creating a polygon.
- Transforming shapes with rotation.
- Creating a pattern.
- Filling with a pattern.
- Converting text to outlines.
This tutorial can be followed by anyone with a basic knowledge of Scribus but should probably not be attempted by people who have never used Scribus before.
Set-up
First you'll need to download and install the "Startling Font" if you don't already have it from here. (You can use any font but this one looks right.)
- Open Scribus and create a new document (A4/Letter Portrait will be fine).
This little project needs quite a bit of space so it's probably best to create each "layer" on a different page.
- Choose menu Page → Insert…
- Change the number of pages to 2 and OK the dialog.
The Background "Flower"
- Go to the document's first page.
- Choose menu Insert → Default Shapes → Right-angle triangle (it's the third one down the list).
- Click somewhere near the centre of the page.
- Enter a Width of 14 and a Height of 150.
- OK the dialog.
- In
 Properties ⟩⟩ Colours set the Line colour to "None".
 - Set the Fill colour to "Red" with a Shade of 60%.
You've now got your first starting triangle - see figure 1.
- With the triangle selected, choose menu Item → Duplicate
- Select the duplicate and in
 Properties ⟩⟩ X,Y,Z press the "Flip Horizontal" icon (the double-headed horizontal arrow).
 - Change the Width to 24pt.
- In
 Properties ⟩⟩ Colors set the Fill colour to "Yellow".
 - Drag the new yellow triangle to the right a bit (so you can more easily select the other one).
- With the yellow triangle still selected, shift-select the red one.
- Choose menu Windows → Align and Distribute
- In the Align and Distribute palette, set "Relative To" to Last Selected.
- Press the "Align right sides of items to left side of anchor" icon (top left).
- Press the "Align Tops" icon (second from left on the bottom).
You should now have two triangles the same as figure 2.
- Select the red triangle.
- Choose menu Item → Transform…
- Press the Add button (bottom left) and choose "Rotation" from the drop-down menu.
- Set the Angle to 13.9 degrees (you'll have to type it).
- In the "Origin" box select the top-left circle.
- Set the number of copies to 25.
- OK the dialog.
Halfway done, now for the other bit.
- Select the yellow triangle (you may need to drag-select it to make sure you don't select anything else).
- Choose menu Item → Transform…
- Press the "Add" button (bottom left) and choose "Rotation" from the drop-down menu.
- Set the Angle to 13.9 degrees as before.
- In the "Origin" box, this time, select the top-right circle.
- Set the number of copies to 25.
- OK the dialog.
You should now have a nice "flower" like that in figure 3.
Don't worry about the edges being ragged, you'll fix that at the end.
- Drag-select everything you've drawn on this page.
- Choose menu Item → Group
The Explosion
Now you'll need to draw the "explosion" that goes between the background and the text.
- Scroll down to the second page.
- Choose menu Insert → Insert Polygon → Properties…
- Change the number of corners to 7.
- Click the "Apply Factor" check-box to activate it.
- Set the "Factor" to -45% (minus 45).
- Set the "Curvature" to 20%.
- Click near the middle of the page.
- Enter a Width of 260pt and a Height of 160pt.
- OK the dialog. (Drag the shape, if necessary, to the centre of the page.)
- With the shape selected, in
 Properties ⟩⟩ X,Y,Z set the Rotation to 330 degrees.
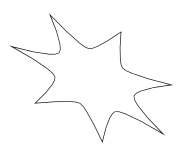
You should now have your starting shape as in figure 4.
- In
 Properties ⟩⟩ Line set the Line Width to 3pt.
 - In
 Properties ⟩⟩ Colours set the Fill colour to "White".
 - Choose menu Item → Multiple Duplicate
- OK the dialog without making any changes.
Now for the dotted fill. Hold onto your hat!
- Choose menu Insert → Default Shapes → Circle
- Click anywhere you have some space.
- Enter a Width of 16pt and a Height of 16pt also.
- OK the dialog.
- In
 Properties ⟩⟩ Colours set the Fill colour to "Blue".
 - Set the Shade to 60%.
- Set the Line colour to "None".
- With the small circle selected, choose menu Item → Transform…
- Press the Add button and choose "Translation" from the drop-down menu.
- Set both the Horizontal and Vertical values to 8pt.
- Set the number of Copies to 1.
- OK the dialog.
- De-select everything and re-select just the copied circle (on the right).
- In
 Properties ⟩⟩ Colours set the Fill colour to "None".
 - Drag-select both circles.
- Choose menu Item → Group
- Choose menu Item → Send to Patterns
- Enter a name of "Dots" and OK the dialog.
- Select the spiky shape you created earlier (it's actually the duplicate on the top of the two).
- In
 Properties ⟩⟩ Colours press the Fill icon and choose "Pattern" from the drop-down menu below it.
 - Select the "Dots" pattern.
- In the "Scaling" area below the patterns, set both the Y-Scale and Y-Scale value to 25%.
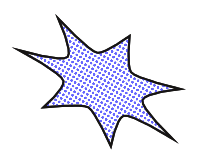
Phew! You should now have your dot-filled shape as in figure 5.
- Drag-select both the spiky shapes.
- Choose menu Item → Group
The Text
Now you'll create the text.
- Scroll down to the third page.
- Create a text frame that is around 400pt across by 160pt high.
- Double-click the frame and enter "BANG" (without the quotes) as the text.
- Select the page background to de-select the frame.
- Re-select the frame.
- In
 Properties ⟩⟩ Text, set the font to be "Startling Font".
 - Set the font size to be 100pt.
- In Colour & Effects set the text colour to be "Red".
- Choose menu Item → Convert To → Outlines
- Re-select the text.
- Choose menu Item → Ungroup
- Choose menu Item → Combine Polygons
- Re-select the text.
- In
 Properties ⟩⟩ Colour set the Line colour to "Black".
 - In
 Properties ⟩⟩ Line set the line Width to 3pt.
 - Choose menu Item → Multiple Duplicate
- OK the dialog without making any changes.
- Select the text (actually the top copy).
- Press the down cursor key twice.
- Press the right cursor key twice.
- In
 Properties ⟩⟩ Colour set the Fill colour to "Black". (This is in case you want to move the shadow farther along.)
 - Choose menu Item → Level → Lower
You should now have some text with a shadow, like figure 6.
- Drag-select the text.
- Choose menu Item → Group
Bringing Things Together
- Select the text.
- Scroll up and shift-select the spiky shape.
- Scroll up again and shift-select the "flower".
- In the
 Align & Distribute palette (open it again if you closed it earlier) make sure the "Relative To" is set to "Last Selected".
 - Press the "Centre on vertical axis" icon.
- Press the "Centre on horizontal axis" icon.
Finishing Up
Just one more thing to do to tidy things up.
- Choose menu Insert → Insert Shape → Default Shapes → Circle
- Click anywhere on your page.
- Enter a Width and Height of 300pt.
- OK the dialog.
- In
 Properties ⟩⟩ Colours set the Line colour to "White".
 - In
 Properties ⟩⟩ Line set the line width to 6pt.
 - With the white circle still selected, shift-select the "flower".
- In the
 Align & Distribute palette make sure the "Relative To" is set to "Last Selected".
 - Press the "Centre on vertical axis" icon.
- Press the "Centre on horizontal axis" icon.
And there you have it. Your very own piece of pop art.
