How to create a retro ribbon badge
| Installation • Usage • PDF issues • Imposition • Other |
Button … Menu → Choice … Keyboard
Introduction
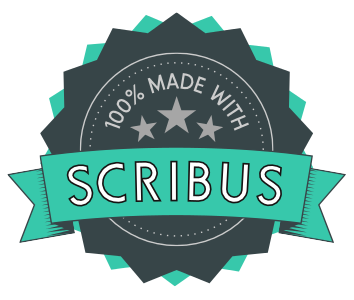
This tutorial will show you how to create a retro-looking badge with a ribbon using only the tools available in Scribus.
It was inspired by this Inkscape tutorial.
You will be taken through each step quite carefully but absolute beginners should make sure they already know the Scribus basics before trying it. If you've never used Scribus before you might find it all a bit too confusing.
Specific techniques used in this tutorial
- Creating polygons.
- Aligning objects.
- Transforming objects with scaling, rotation and translation.
- Adding text to a path.
- Combining shapes.
- Performing path/shape operations.
- Changing manual tracking on text.
- Putting an outline on text.
- Editing shape nodes.
- Making a column of shapes.
- Nudging objects with the keyboard.
Font
To follow this tutorial to the letter you'll need to download the Fundamental Brigade font from here.
The download consists of multiple files but you only need "Fundamental Brigade.ttf".
Install the font before you start Scribus.
The Colours
- Start Scribus and create a new document (A4/Letter portrait will be fine).
You'll need four colours for this tutorial:
- Badge - R 55, G 69, B 72.
- Stars - R 166, G 166, B 166.
- Badge Text - R 204, G 204, B 204.
- Ribbon - R 55, G 200, B 171.
Use the ![]() Color Editor - menu Edit → Colors… - to add these to your document.
Color Editor - menu Edit → Colors… - to add these to your document.
If you don't know how to do this see the Scribus Help Manual via the Help menu, section "Documentation / Editing Colors". If you don't have this manual installed, look at the "Colours" section on this other tutorial and substitute RGB for CMYK. If you're still struggling, try asking about it on the Scribus Forum.
The Badge Background
The first thing you'll create will be the background of the badge.
- Choose menu Insert → Insert Polygon → Properties… to open the
 Polygon Properties dialog.
 - Set "Corners" to 13.
- Leave the "Rotation" at 0.
- Check the "Apply Factor" box.
- Change the "Factor" to be -10% (negative 10%).
- OK the Polygon Properties dialog.
- Click near the top left your document.
- Enter a Width and Height both of 200pt.
- Ensure that the "Remember Size" box is checked.
- Ok the Enter Object Size dialog.
That's you first shape, now you need its companion.
Now, repeat the actions above with the following changes:
- In the Polygon Properties dialog also set the "Rotation" to 13.
- When clicking to draw the second polygon click over to the right of the first so they're easier to manipulate.
Now you'll colour the polygons and move them into position.
- Select the first polygon - to the left - and go to
 Properties ⟩⟩ Colours
 - Press the "Line Color" icon and select "None" from the colour list.
- Press the "Fill Color" icon and select "Badge" from the colour list.
- Select the second polygon - to the right - and go to
 Properties ⟩⟩ Colours again.
 - Press the "Line Color" icon and select "None" from the colour list.
- Press the "Fill Color" icon and select "Ribbon" from the colour list.
- Choose Windows → Align & Distribute to open the
 Align & Distribute palette (A&DP).
- Drag-select the two polygons and, in the A&DP, press the "Center on Vertical" icon, then the "Center on Horizontal" icon.
- Deselect the polygons and re-select the top one.
- Use the Cursor arrow keys on your keyboard until the shapes have been aligned to your satisfaction.
- Select the top polygon and right-click choosing Level → Lower to Bottom from the menu.
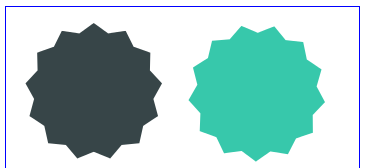
- You've now got your basic badge shape - see figure 3.
The Badge Lines and Text
You'll now create the lines and text that go onto the badge itself.
- Drag-select your polygons.
- Right-click and choose Group from the menu.
- Drag the group to the top-left of your document to give you some room.
- Choose menu Insert → Insert Shape → Default Shapes → Circle
- Click on your document to the right of your badge.
- Enter a Width and Height of 140pt and OK the dialog.
- Go to
 Properties ⟩⟩ Colors, press the "Line Color" icon and select the "Badge Text" colour.
 - Choose menu Item → Transform…
- Press the Add… button on the bottom-left and select "Scaling" from the drop-down menu.
- On the top-right, change both the scaling factors to 90%
- In the "Origin" box select the centre circle.
- Change the "Copies" value to 1.
- OK the dialog.
- Select the new smaller circle and go to
 Properties ⟩⟩ Line
 - Using the "Type of Line" drop-down menu select the dotted line type 8th down the list.
You should now have something that looks like figure 4.
Now for the text.
- Click on the inner circle that you've just created.
- Choose menu Item → Transform…
- Press the Add… button on the bottom-left and select "Scaling" from the drop-down menu.
- On the top-right, change both the scaling factors to 70%
- In the "Origin" box select the centre circle.
- Change the "Copies" value to 1.
- OK the dialog.
- Create a text frame under the circles that is the same width of the larger circle.
- Add the text "100% MADE WITH" (without the quotes) to the text frame.
- Go to
 Properties ⟩⟩ Text
 - Change the font to "Fundamental Brigade" and the font size to 16pt.
- Change the font colour to "Badge Text".
- Shift-select the smaller circle above.
- Choose menu Item → Attach Text to Path
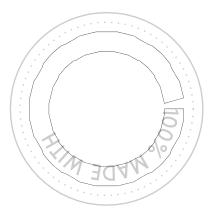
You should now have something that looks like figure 5. Obviously the text is in the wrong place so you'll need to fix that.
- With the text object selected, go to
 Properties ⟩⟩ Text and open the "Path Text Properties" sub-tab. You might have to scroll down to see it.
 - In the "Start Offset" input field enter the value of 152pt.
The text should now be in the correct position at the top. (If it's not, change the value to suit.)
- Drag-select the circles and the text.
- Right-click and choose Group from the menu.
- Shift-select the group of polygons to the left.
- In the A&DP make sure "Relative To" is set to "Last Selected".
- Press both the "Center on Vertical" and "Center on Horizontal" icons.
You should now have something that looks like figure 6.
The Stars
Now you'll create the stars to add to the badge.
- Choose menu Insert → Insert Polygon → Properties… to open the
 Polygon Properties dialog.
 - Set the number of "Corners" to 5.
- Set the "Rotation" to 0.
- Set the "Factor" to -52% (minus 52%).
- OK the dialog.
- Click somewhere in the middle of the gap to the right of your badge.
- Enter both Width and Height as 30pt.
- OK the dialog.
- Go to Properties ⟩⟩ Colours
- Press the "Line Color" icon and select "None" from the colour list.
- Press the "Fill Color" icon and select "Stars" from the colour list.
You've now got your first basic star. Next the two companion stars.
- With the star still selected, choose menu Item → Transform…
- Press the Add… button on the bottom-left and select "Scaling" from the drop-down menu.
- On the top-right, change both the scaling factors to 70%.
- Press the Add… button on the bottom-left again and select "Rotation" from the drop-down menu.
- On the top-right, change "Rotation" to 10%.
- Change the "Copies" value to 1.
- OK the dialog.
Your first companion star has been created. De-select everything then drag the new smaller star to the right of the original so you can see it properly.
- With the smaller star selected, choose menu Item → Duplicate
- In
 Properties ⟩⟩ X,Y,Z press the "Flip Horizontal" icon.
That's the other star created. Drag it to the left of the larger star - see figure 7 - but don't worry about aligning them properly just yet, you'll do that later.
The Ribbon Front
And now you get to the main event of this tutorial, the ribbon. Are you glad you've stuck with it so far?
Hold on tight, there's a lot to do.
First you'll create the main body of the ribbon.
- Choose menu Insert → Insert Shape → Default Shapes → Circle
- Click below the bottom-left-hand of the badge.
- Enter a Width of 400pt and a Height of 100pt.
- OK the dialog.
- With the flat ellipse selected, choose menu Item → Transform…
- Press the Add… button on the bottom-left and select "Translation" from the drop-down menu.
- On the top-right, change the Vertical value to 50pt.
- Change the "Copies" value to 1.
- OK the dialog.
You should now have something that looks like figure 8.
- Drag select both ellipses.
- Choose menu Item → Combine Polygons
You've now made a single polygon out of the previous two. Now you'll create something to manipulate that new polygon.
- Choose menu Insert → Insert Shape → Default Shapes → Downward-pointing Triangle (near the bottom of the menu).
- Click just above the middle of the badge.
- Enter a Width of 200pt and a Height of 600pt.
- OK the dialog.
- De-select everything and re-select the long triangle.
- Shift-select the combined ellipses.
- In the A&DP make sure "Relative To" is set to "Last Selected".
- Press the "Center on Vertical" icon.
- Press the "Align Tops" icon.
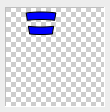
You should now have something that looks like figure 9.
- De-select everything and re-select the long triangle.
- Shift-select the combined ellipses.
- Choose menu Item → Path Tools → Path Operations…
- In the "Operation" box press the "Intersection of the Shapes" icon (the third from the left).
The result in the top-right-hand area should look like figure 10. If it doesn't, check the "Swap Shapes" box.
- OK the dialog.
- Select the new "double curve" and choose menu Item → Split Polygons
- De-select everything and re-select the lower curve.
- Right-click and choose Delete from the menu as you don't need it.
You've now got the start of your ribbon.
- Select the remaining upper curve and choose menu Item → Duplicate
- Drag the duplicate to the side for later.
- Create a text frame under the original ribbon that is around the width of the ribbon.
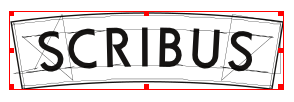
- Add the text "SCRIBUS" (without the quotes) to the text frame.
- Go to
 Properties ⟩⟩ Text
 - Change the font to "Fundamental Brigade" and the font size to 40pt.
- In the "Advanced Setting" sub-tab change the "Manual Tracking" to 8%.
- With the text frame selected, shift-select the the original ribbon.
- Choose menu Item → Attach Text to Path
The text - see figure 11 - looks totally wrong but that's easily fixed.
- With the text selected, go to
 Properties ⟩⟩ Text and open the "Path Text Properties" sub-tab.
 - In the "Start Offset" input field enter the value of 295pt.
- In the "Distance from Curve" input field enter the value of -39pt (minus 30pt).
- Check the "Show Curve" box to see what's happened.
You should now have something that looks like figure 12 but you're not finished yet. (If your copy doesn't look right try changing the values of "Start Offset" and "Distance from Curve" until it does.)
- Un-check the "Show Curve" box. You don't need to see it anymore and it will spoil the effect.
- Change the colour of the text to "White".
- Click the "Outline" icon under the colour choices.
- Click the "Outline" icon under the colour choices again but keep pressing until a little window appears.
- Change the "Linewidth" to 2%.
- Select the duplicated ribbon.
- Go to
 Properties ⟩⟩ Colors
- Press the "Line Color" icon and select "Badge" from the colour list.
- Press the "Fill Color" icon and select "Ribbon" from the colour list.
- Drag-select both the ribbon and the text.
- In the A&DP press both the "Center on Vertical" and "Center on Horizontal" icons.
If the text has disappeared, de-select everything, then select the ribbon, right-click and choose Level → Lower to Bottom to get the text above the ribbon.
You should now have something like figure 13.
- Drag-select the ribbon and text.
- Right-click and choose Group from the menu.
The Ribbon Ends
You're close to the finish line now, on the home stretch.
Now you need to make the ends of the ribbon and this is the really tricky part.
- Choose menu Insert → Insert Shape → Default Shapes → Rectangle
- Click anywhere below the ribbon.
- Enter a Width of 40pt and a Height of 50pt.
- OK the dialog.
- Double-click the rectangle to open the
 Node Editor dialog.
 - In the Node Editor dialog press the "Add Nodes" icon (second from left, top row).
- Click the rectangle you drew in the middle of the right-hand vertical edge.
- In the Node Editor dialog press the "Move Nodes" icon (top left).
- Go back to the rectangle and drag the node you just added to the left so that the X-Pos and Y-Pos in the Nodes Editor dialog read as X=25pt and Y=25pt. See figure 14. (Or you can change the values directly in the entry fields.)
- When done, press the End Editing button.
- Go to
 Properties ⟩⟩ Colors
 - Press the "Line Color" icon and select "Badge" from the colour list.
- Press the "Fill Color" icon and select "Ribbon" from the colour list.
Now you'll make the "frill".
- Choose menu Insert → Insert Shape → Default Shapes → Right-pointing Triangle
- Click anywhere below the shape you've just been drawing.
- Enter a Width of 20pt and a Height of 2.5pt (two point five).
- OK the dialog.
- Go to
 Properties ⟩⟩ Colors
 - Press the "Line Color" icon and select "None" from the colour list.
- Press the "Fill Color" icon and select "Badge" from the colour list.
You've got a starting triangle but you need to make more.
- With the triangle selected, choose menu Item → Multiple Duplicate
- Change to the "By Rows and Columns" tab.
- Change the "Number of Rows" value to 20.
- OK the dialog.
- Drag-select all of the triangles.
- Right-click and choose Group from the menu.
- Shift-click the earlier shape with the "kink" in it.
- In the A&DP press both the "Align left sides" and "Center on Horizontal" icons.
Almost finished with the ribbon end now, just a couple of things left to do.
- Choose menu Insert → Insert Shape → Default Shapes → Right-angle Triangle (third one down).
- Click anywhere below the group you've just made.
- Enter a Width of 15pt and a Height of 10pt.
- OK the dialog.
- Go to
 Properties ⟩⟩ X,Y,Z
 - Press the "Flip Vertical" icon.
- Go to
 Properties ⟩⟩ Colors
 - Press the "Line Color" icon and select "None" from the colour list.
- Press the "Fill Color" icon and select "Badge" from the colour list.
- Shift-click the group of shapes including the "frill".
- In the A&DP press both the "Align left sides" and "Align bottoms" icons.
- Drag-select all of the shapes you've just created.
- Right-click and choose Group from the menu.
- Go to
 Properties ⟩⟩ X,Y,Z
 - Change the "Rotation" to 350 degrees.
You should now have something like figure 15.
- With the group selected, right-click and choose Level → Lower to Bottom from the menu.
- Choose menu Item → Duplicate
- With the duplicate selected, go to
 Properties ⟩⟩ X,Y,Z
 - Press the "Flip Horizontal" icon.
- Right-click and choose Level → Lower to Bottom from the menu.
Putting it all Together
It's great that you're still reading this. I hope you've been following along in Scribus too.
Now you need to finish the ribbon off, align it with the badge and move the stars - remember them? - into place.
- Drag one of the ribbon ends - you can guess which one - over to the corner of one end of the ribbon.
There's no way to get Scribus to align these automatically, you'll just have to do it by eye but you need to put the corner of the small dark-grey triangle under the corner of the bottom corner of the ribbon. See the red arrow in figure 16.
- Once you've got that looking correct, do the same for the other ribbon end at the other end of the ribbon and you'll get something like figure 17.
- Drag-select all the parts of the ribbon and right-click choosing Group from the menu.
- Right-click the group and choose Level → Raise to Top from the menu.
Now you'll align the ribbon with the badge.
- Select the ribbon.
- Shift-select the centre of the badge (you'll actually select one of the circles but that's fine).
- In the A&DP press both the "Center on Vertical" and "Center on Horizontal" icons.
The ribbon is way too high up the badge but you can fix that easily.
- Keep the down-arrow on your keyboard pressed down until the ribbon is where it looks good. (Use the up-arrow button if you went too far.)
I'd suggest putting the top of the ribbon around or just below the centre of the circles but it's up to you.
Now there's just the stars to do.
- Drag-select all of the stars.
- In the A&DP go to the Distribute tab.
- Click the "Make Horizontal Gaps between items equal to the value specified" icon. (That's a really horrible name for an icon!)
- De-select everything and select the larger centre star.
- Use the up-arrow on your keyboard to nudge the larger star up until it's in a place that you like (around 15 points higher looks good).
- Drag-select all of the stars.
- Right-click and choose Group from the menu.
- Right-click the group and choose Level → Raise to Top from the menu.
- Shift-select a circle in the badge.
- In the A&DP go back to the Align tab.
- Make sure "Relative to" is set to "Last Selected" (otherwise you'll make a mess).
- In the A&DP press both the "Center on Vertical" and "Center on Horizontal" icons.
Now the stars are way too low but you can fix that easily too.
- De-select everything and select the stars.
- Use the up-arrow on your keyboard to move the stars to somewhere that looks nice. Making the gap between the top of the large star and the bottom of the text the same as the gap between the bottom of the small stars and the ribbon looks good.
And, that's it, finally. You're done.
How's about that? That wasn't too hard was it? Well, okay, it was probably a lot of work but the result was worth it. Wasn't it?
