Symbols
Symbols are a new feature in 1.5.x versions of Scribus. Exactly what they are intended for is a bit unclear, but this wiki page will hopefully spur someone to add or supply some further information.
The name is a bit unfortunate, since in DTP we might most often associate it with symbol glyphs in a font. Experimentation with the Symbol feature shows it to have an association with Patterns, though there may be some other uses. What I want to do in this article is go over some things I have learned about usage. In this article I will keep Symbol capitalized to distinguish it from font symbols.
Sources of Symbols
It seems that almost any Scribus object can become a Symbol. Text frames, image frames, render frames, shapes, polygons, arcs, spirals, lines, Bezier lines, freehand lines, calligraphic lines, even PDF form checkboxes (and presumably other form elements) can all become Symbols. At least with a cursory trial, tables cannot become Symbols. An important thing to note about the conversion to a Symbol is that this cannot be reversed, in other words, you can't convert a Symbol into anything else. So if you want to convert an image frame into a Symbol, yet keep the original as an image frame, make a copy.
From the menu, choose Item > Convert > Symbol, or you can right-click the object for the context menu for the same result.
Editing a Symbol
A Symbol is a special object, or perhaps it's better to consider it not an object at all, in the Scribus sense. Your original item which you converted into a Symbol has some limited editing capabilities of that particular instance of the Symbol. These include the elements in the X,Y,Z tab of properties, and you may also create a drop shadow.
Symbol Dialog
Additional editing is available from the Symbol dialog (from menu, Windows > Symbol). This will show all of your current Symbols from which you can for one thing, drag and drop to a page for another instance of your Symbol, or right-click and choose Edit item (or Remove item if you no longer want this Symbol). Double-clicking the item also brings up the editing window. If you remove the Symbol from the Symbol dialog, all instances of it are gone. One more option you have in the dialog is to right-click the white space outside the Symbols to choose to show only the symbols and not their names.
Editing Window
Although it might seem convenient to bring a number of your Symbols into this window to edit serially, you can only have one at a time. When it first opens, you might think you are ready to edit, since the Symbol is outlined in red (as shown below), but you need to click it before editing is possible. Once you do this, look to Properties to see all of your editing capabilities, since now you should see a number of tabs which will be selectable. Keep in mind that you will be editing all the instances of your Symbol in this window.
What you can edit will be similar to what you could have edited in the original source. For the text frame, you can edit the font, linespacing, color, and the various items in the Text tab. You can even change the text. For images you may edit what is in the Image tab, and also load a new image with the context menu. Careful with Render frames – an initial experiment caused Scribus to crash when I tried to edit the content. In the Shape tab, you can select Text Flows, but for Symbols this doesn't seem to have any effect on underlying text frames. Given these initial comments, experimentation will show you what you can do with other kinds of content from other sources.
A curious feature in the editing window is that, when you bring up the context menu, one of the choices you have is to Convert to a Symbol. You can make another symbol by changing the default name that pops up, but this doesn't seem of be of practical consequence, since a change to one symbol changes the other copy of it. It also would appear that you can send to the Scrapbook, but this did not seem to work, so if you did want some object in the Scrapbook and as a Symbol, send to the Scrapbook first, then convert to a Symbol. You will also see that you can Send to Patterns, but since symbols already appear in your pattern list, this also seems a worthless exercise.
Using Symbols
The simplest way to use a Symbol is in its basic state as it was originally created. You have the original one, of course, but you can make more of these by dragging and dropping from the Symbol dialog. Keep in mind the limitations, such as the fact that these are minimally editable individually, and that they cannot have Text Flows activated. You have the Symbol which can have some physical changes from the X,Y,Z tab, and can have a drop shadow, that's it.
Use as a Pattern
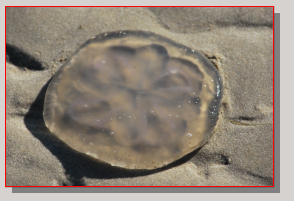
A more interesting way to use Symbols is as the basic element of a pattern, keeping in mind that the original source is highly variable – text, image, render frame, shape, lines of various types, and even PDF form elements. Let's look at this example of what began as an image of a jellyfish. Here we see it as it appears in the Symbol editing window, before being selected:
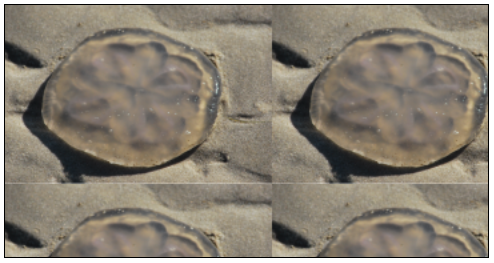
Although we might change the size of this, we'll see that changing the size of the Symbol at this point isn't so important. What we'll do with this is to use this as a Pattern, so we will create another frame and use this for the background fill. In this case we will make a text frame, then go to the Color tab of Properties, and select Pattern for Fill, selecting our Symbol in the upper right corner. To the right we see the initial result, not very impressive or interesting.

|
|
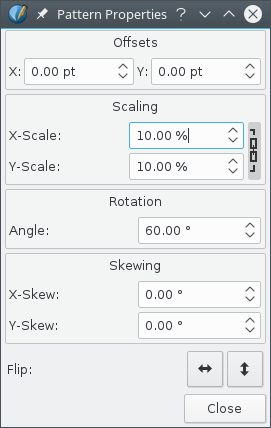
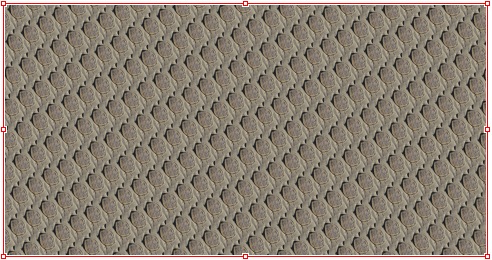
But if we click on the Properties button under Pattern and make the changes as shown, we then get what you see on the right.
|
|
Who would guess this started with a jellyfish? |
At this point, recall this is a text frame, and presumably we wanted to put text in it. Even a large, dark font will likely be difficult to read with this background. We know that if we try to set the Transparency of the background, our text will similarly become transparent. We could do that, then place a similarly sized new frame on top, but a much quicker approach is to edit our symbol from the Symbol dialog. In this case we used Image Effects to increase brightness and reduce contrast a bit, with this result:
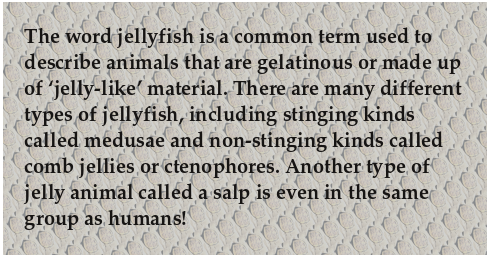
|
If it turns out we want to switch to a different Symbol, selecting a new one in Patterns will continue to use the same Pattern Properties settings. Image Effects would need to be reapplied. |
