How to create a heart shape
Jump to navigation
Jump to search
| Installation • Usage • PDF issues • Imposition • Other |
Introduction
Key
This article uses these graphical conventions
Button … Menu → Choice … Keyboard
This tutorial will show you how to use some of the Scribus drawing tools to make a simple "heart" shape.
Specific techniques used in this tutorial
- Setting a grid.
- Creating a circle.
- Creating a bezier curve.
- Converting to a polygon.
- Joining curves.
- Joining shapes.
Setup
- Open Scribus and create a new document. (A4/Letter portrait will do.)
First, you should display the grid and set grid snapping on. This is important because it will allow you to create the shapes much easier than otherwise.
- Choose menu File → Document Setup
- Select "Guides" from the scrolling list on the left.
- Check the "Show Page Grid" icon.
- Set the "Major Grid" Spacing to 100pt.
- Set the "Minor Grid" Spacing to 20pt.
- OK the dialog.
- Choose menu Page → Snap to Grid. If "Snap to Grid" was already ticked then don't select it, leave it ticked.
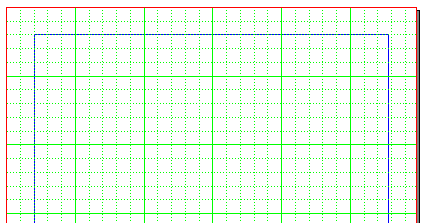
Your document should look like figure 1.
Circles
- Choose menu Insert → Insert Shape → Default Shapes → Circle
- Draw a circle the same size as two of the larger grid squares.
- Choose menu Item → Duplicate
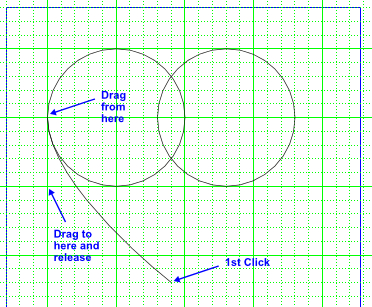
- Drag the duplicated circle across to the right of the original so that the duplicate overlaps the original by two of the smaller grid squares - see figure 2.
Curves
It might be helpful to look at figure 3 before trying the next bit so that you have a better idea of what the instructions mean.
- Choose menu Insert → Insert Bezier Curve
- Click at the point seven small grid squares down from the bottom of the two circles aligned vertically with the point where the two circles meet.
- Drag the pointer down from the left of the left-hand circle by the same distance as one of the larger grid squares and release the mouse button.
- Right-click to complete the bezier curve.
- Select the curve you've just drawn.
- Choose menu Item → Duplicate
- Go to
 Properties ⟩⟩ X,Y,Z and press the "Flip Horizontal" button.
 - Drag the flipped curve so that its bottom end meets the bottom end of the original curve.
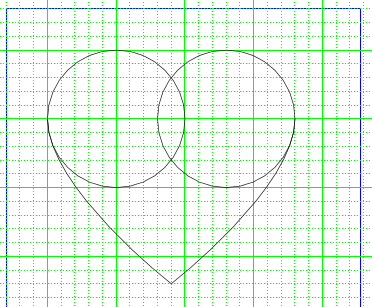
You should now have something that looks like figure 4.
Joining Up
- Select one of the curves.
- Shift-select the other curve.
- Choose menu Item → Path Tools → Connect Paths
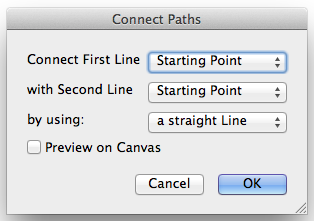
- Set "Connect First Line" to "Starting Point".
- Set "with Second Line" to "Starting Point".
- Check to see that the dialog box looks like figure 5 and press OK
- Re-select the new joined curve.
- Choose menu Item → Convert to → Polygon
- Select one of the circles.
- Shift-select the other circle.
- Choose menu Item → Path Tools → Path Operations…
- Accept the dialog box as it is and press OK
- Select the joined circles.
- Shift-select the joined curves.
- Choose menu Item → Path Tools → Path Operations…
- Accept the dialog box as it is and press OK
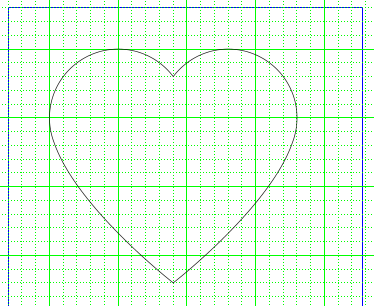
You should now have you heart shape as it looks in figure 6.
You can now add this shape to your scrapbook and use it wherever you need it.

